 Annihilation
Unmanned tanks that can be controlled from the cyberworld? That's a GREAT idea!
By Rai (Drillman)
Lan has a dream where he's in the Cyberworld and Megaman says he has to leave. This couldn't be foreshadowing for anything, could it? Nah, the title character would never leave. As Lan wakes up, he learns that the city is now under martial law in anticipation of Alpha's attack. The tanks have rolled in! Alright! Let's go see th-...uh...those are tanks?!
 |
| The future of warfare is adorable. |
Once you've visited them, Lan gets an e-mail from Sci-Lab requesting his help with the whole Alpha thing. To get your pass to ride the Metroline, you gotta visit Protoman in SciLab Square. The quickest way there is through the shortcut in Yai's PC, so jack in there, head to Protoman, get your pass, jack out, then head for the Metorline.
Before getting to work, now is a good time to get the beginning-of-the-chapter stuff done. New messages on the message boards, three new jobs at the job board, though you should put off that Legendary Tomes job for a bit since it requires you to trade a chip you most likely don't have. Head to the DNN Station's Editing Room and see the black guy for a chip trade, your HoleMeteor H for his Rook F. Then there's fellow N1 D-Block contestant Jennifer in the "Blazing Inferno" room of Hades Isle with the last step of the chip trade chain of this game, the GrabBack K you got last chapter for her ZeusHammer Z! You can take on the Quiz Queen, she's the little girl next to the hospital's operating room. Answers are shadow, pi, slippers, ohio, age, Japan, lamb, Gretel, Jupiter, and snake (General knowledge and jokes instead of game-related questions this time). The prize is Barrier200 E, which could be used for learning the 500Barrier PA. Mist/Bowlman has advanced to the next level, so go fight Mist/Bowlmanα to get the handy Mist/Bowlman chip. If you're playing Blue version, Punk is now fully upgraded, so you can fight Punkβ to your heart's content. If you're willing to go a little out of your way, Drillmanα can be fought behind the NetDealer in Undernet6 for the very handy Drillman chip, and after that you can find his Beta version as a random encounter in Hades net. While in the Undernet, look behind the pillar in Undernet4 for a snivelling Prog that will hand over the SpinDark item, used exclusively for the DarkLicense NaviCust program.
Now go to SciLab and talk to Chaud in Hikari's Lab. You'll then see a scene where an Official explains what Alpha is. Ten years ago, SciLab made various prototypes to try to make an internet like the current one. Alpha is actually that prototype internet, riddled with bugs, and eventually grown to be self-aware. The Alpha rebellion was when all the devices connected to Alpha went haywire. It was originally blamed on the Autonavi that was created at the same time. Sci-Lab had to delete that navi and detain its creator. Interesting. Before you can actually learn what the plan against Alpha is, a convenient alarm draws everyone's attention elsewhere.
 |
| W00T! |
Lan jacks in and you'll end up in a regular looking console. There's some mystery data here to pick up. RegUp2 in the south corner, and HPMemory in the north. You can also win M-Cannons and Needler2 from the viruses in here. The cause of the problem can be found along the northwest side. You'll have to fight three of those "????" enemies like the weaker ones you may have already encountered in the Ura bath lion or the Hades gargoyle. They teleport around the area and occasionally leap at you and start smothering you. They also recover energy at a fast and constant rate, not a pushover kind of baddie. After the battle, Megaman notes how it wasn't like an ordinary virus, as its attacks were meant to absorb him.
Now Chaud and some other Official come to Lan with the info that the enemy you fought was "AlphaBug", a piece of Alpha already infecting the systems of the world. At this point the Officials blow Lan off, feeling he'd just get in the way. You know it can't end there though. Mom phones in with a new request. Seems Dad escaped from the hospital. That's your next stop.
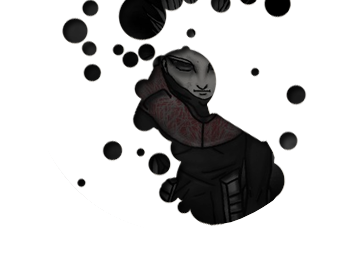
 |
| Says the navi that doesn't have a mouth. |
At the hospital, Mom's been doing a thorough search of the four square feet in the middle of Dad's room and hasn't found him yet. She's counting on Lan to find him and give him his pain medication. She'll give you the Aspirin and now you have to look for clues. Check out his bed. A note tells you he's run off, no duh. There's also a card key. Lan doesn't know where he is, but the card key should be a pretty big clue that you should search around SciLab. There's a door in Doc Hikari's Lab that never opened before. Now it does. Seems Dr. Hikari is extra determined to take care of Alpha himself since his father, Dr. Hikari Sr. made it. Dr.Jr. wants to delete Alpha with his own hands out of respect to Dr.Sr.. Also, it seems the reason Alpha isn't fully revived is because Dr.Sr. installed a program called Guardian in Alpha's core that prevents it from activating completely. In a nice, dramatic moment, Lan convinces his dad to let him go delete Alpha. It's all based on the simple reasoning that Lan is his son and Megaman is a total badass. Makes sense to me.
Dr.Hikari's third degree burns start acting up, so Lan comes to the rescue with the Aspirin. At that point the computer finishes the search for the WWW base. It's in the "Demon Waters" out to sea and so they'll need a good boat to get there...
Go to the boat at the Beach, seems the engine needs replacing. If only Lan knew somebody with lots of money...somebody short and irritable...somebody that lives in the big yellow house in ACDC...somebody named Yai. When talking to Yai, Lan doesn't want anybody following him to the WWW base, y'know, like everyone followed him to the WWW and Gospel bases in the previous two games. "It's too daaangerous, I don't want anybody invooolved, they could get huuurt." Listen moron, they followed you through explosions and radiation, I think they can follow you through some rough waters.
Lan: "Promise you won't tell anybody."
Yai: "Sure thing, I promise, I'll let you go alone, just like you always do."
Lan: "Thanks" *leaves*
Yai: *phones Mayl* "Hey, Lan's trying to go to the final dungeon alone again...yep, just like those other two times...nope, he still doesn't realize how helpful we are...yep, we're going to tag along anyway...uh huh...okay...alright, you tell Dex, I'll pass it onto Chaud..."
Now just go to bed, the real deal is tomorrow. We cut to a scene at the WWW base. Wily adresses all his operators except Inukai, who was killed for failing in the Ranking business. That oughta keep the others in line. After delivering a pep-talk to his troops, Wily turns to his screen where he makes a declaration of war to the world. As Match would say, things are definitely heating up.
The next morning, Lan's up nice and early and ready to tackle the WWW base. You get an e-mail from Dad with the "Alpha" program attached. When equipped, Alpha will let you see spots in the WWW network where Alpha is hiding in the floor, more on that later, but overall, you don't really need this program. On your way out of ACDC, talk to the Official on the road beside the park and you can get the Apprentice's Extra folder, though that won't have much use for you now either. Just head for the boat. Surprise surprise, the whole gang is there. Now here comes a really stupid part. Lan becomes a sexist pig and states that Mayl and Yai can't come along 'cause they're girls, Chaud backs him up on this, and you KNOW there's something wrong when Lan and Chaud are on the same page. The girls are offended at first, but then they AGREE...huh?
Mayl: Yai, Chaud is right...
Yai:...I know
What is that based on? Yai made the most sense in this argument when she pointed out she was in the top 8 at the N1. That fact already puts her on the same level as Dex. However they concede to chauvinist logic and their presence in the chapter comes to an end. At this point, Tora shows up wanting to join the boat. He's male, so he passes the test.
The guys arrive at Skull Castle the WWW base. Chaud leads on with "every second counts" and shows this tension by slowly walking on ahead, and the others show their concern for that tension by standing perfectly still and watching as Chaud slowly walks away. Oh, the excitement is killing me! When you regain control of Lan, don't follow the guys just yet. Walk straight up until you hit a wall and jack into a hidden console. You can get the VERY handy-dandy program called "Collect" in here that makes it so you never get Zenny or HP recoveries at the end of a battle. You'll always get a chip, or if you're fighting an enemy that has no chip (like first-time bosses, Punk, or AlphaBug) then you get nothing. You can also buy some SubChips in this console. When you're done with that, jack out and follow the others.
It seems they've found a room with a strange looking chair and some advanced equipment. Inspect the console that Tora is standing in front of for a RegUp2, then check the elevator at the other end of the room to find that it's locked. Megaman suggests jacking in to open it, but there's nowhere to jack in. Enter the scruffy guy in the green suit you've seen hanging around in various spots in the game. Turns out it's the legendary Dr. Cossack! He's not quite the blithering idiot in our epilogues, but that's probably because he's been taking his medication. Cossack was the one that developed the AutoNavi, the one that got blamed for all of Alpha's work. Cossack offeres to help you through the door. He explains the chair is a Pulse Transmission System, a device that sends a human's mind into the cyberworld as a cybernetic representation of himself. Problem: you die in the cyberworld, you die in reality. Guess why SciLab never marketed this thing.
 |
| "Daddy!" "My son!" |
Enough plot stuff for now, onto the action! Take the elevator and head towards the next door. The guys are attacked by a Wilybot Brand AutoTank, only this one is using Flashman's Hypno Flash. Tora distracts it, Chaud tries to stop the beam, and Lan jacks in to stop the robot. You'll end up in the very cool WWW network.

Here's the deal with the puzzles: There are floating guard drones patrolling all over the place. If Megaman is underneath one, it'll pick him up and dump him in the trash heap. You can see the first trash heap as you jack in, it's separated by a conveyer belt pushing you back. There's usually a second trash heap midway through each level that you'll be tossed in once you pass that point. So get caught and it's back to the start or the midpoint. There's more than just avoiding the drones though, There are certain panels where Alpha is hiding in the floor. If you step on that panel, Megaman gets caught and a drone comes and picks him up to dump back at the checkpoint. You can spot the red blobs that represent Alpha if you equip the Alpha program dad sent. The best way to go about this is just to save regularly and reset if you get caught. Cheap, but it works.
For this first tank, head straight and avoid the slowly moving set up of warm-up drones. The last one guards a path to an HPMemory, so veer off to get that first. Further up, the path splits in two branches that lead to the same point, but the left path hides an Alpha trap, so take the right path around and grab the 1800Z. Continue on to another set of drones. Wait until this one passes from left to right then run down to the left. As you round the corner, head for the little nub sticking out to the right and wait until the drone passes from right to left, then run to the right. You'll now have reached the midpoint since there's another trash heap here. Keep on track and you'll reach a slightly faster set of circling drones. Follow one to get by. You'll end up at a locked door that needs ID-DataA. The path continues on, so I guess it's down there.
As you move on, you can clearly see Flashman and glowy Rei standing on the other side of the locked door, grr... When the path splits between a set of drones to the south and a conveyer belt to the north, head south since the conveyer belt leads back to the midpoint. Wait until the last drone passes from right to left, then follow it and duck into the next turn, but don't go far, since Alpha is blocking the path from there. You'll have to wait until the drones all pass from left to right then head to the next path. Grab the Recov150 P at the end of this path then head back and continue left, where ID-DataA awaits. After this, just go ahead and get caught by one of those drones, since they'll just drop you off at the same spot the conveyer belt at the start of this section would have taken you. Now head back to the door and face your old foes. Rei and Flashman go into Full Synchro. This is apparently the same technique Lan and Megaman used at the end of MMBN2, in which a paralyzed Lan had to be able to operate Megaman with his mind instead of his body. Full Synchro seems a lot easier to achieve when your mind is already downloaded into the Cyberworld...
WWW Full Synchro Navi/Operator Battle: Flashman.exe α
HP= 500
Speed= fast
Defense= normal
Movement= random teleport
Objects= Flash Bulb(20 HP)
Attacks= Neon Light(30), Spark Arm(45), Time Stopper(paralysis), AreaGrab(1 stock)
 |
Some 100% efficiency. It's only his V2 form. At 500 HP he's a pushover at this stage of the game, especially if you use Wood-elemental attacks. |
They try a last ditch "Shining Crusher" attack, but Kingman comes in and "crushes" him. Rei and Flash blow up for good. Once you're out, you'll now have a chance to NetBattle Tora and Kingmanβ as much as you want for the rest of Kingman's chips. Tora doesn't follow the other guys from here on out.
|


The first set of drones in here are a little tough to get around, you have to get in between two of them and slowly follow them around, needs some good timing. As you turn the corner, just wait for the drone to be heading in the opposite direction then follow it and duck into the nub, then as the drone passes to the left, run out to the right. Here, the path splits in two short bridges that lead to the same point again. but the one on the right is an Alpha trap. Further up you'll come to a fork with very fast drones moving from right to left. This is another tough one that needs good timing. There are two drones rather close together, so make sure you're following the second one out and not the first. Make a full circle around this road and you can get a RegUp2 (this is the last RegUp in the game. If you don't have 50MB now, you missed one). On your second time around, stop at the teleporter and head through. Careful, as Bubbleman's waiting on the other side.
WWW Navi Battle: Bubbleman.exe α
HP= 800
Speed= slow
Defense= cover
Movement= random teleport in far right column, avoids MM's row
Special Field=Missing Panel in the center of enemy field, rock in panel directly above.
Objects= Rock(500 HP), Bubble(1 HP), Fish(invincible), Crab(20 HP), Bomb(40 HP)
Attacks= Bubble Lead(80), FishMissile(80), Depth Charge(80), Crabton(80), Aqua Shots(100x3), Bubble Wrap(1HP Barrier that regenerates)
 | Not the hardest version of Bubbleman, but still a little tough. Just pack some Elec chips and finish him off with Flashman. |
Seems there's still more in this tank to take care of, so press on. This next array of drones is really tricky. You want to follow the ones on the left, wait until they go in the other direction then follow them quickly and get onto the next path. Grab the 3000Z here and then try to aim for the southwest part of the drone-infested platform. You'll have to go between the drones with some careful timing. The locked door is here, you need ID-DataB. Now head east accross the platform. Wait until the right set of drones is passed in the other direction. On the next road, you may think you need to follow the drone clockwise to get around, but Alpha's guarding that way, so wait until the drone passes to the right, then head left. Wait in the nub until it passes again then go on to get the Data. Head back to the door. On the other side, you'll be met with a long path with a tricky set up of drones. Wait until a gap appears between the first two and step through it, follow them around until you can make it through the second gap. Now you'll be at glowy Sunayama and Desertman. They pull off a hiding trick at first, but then Gutsman shakes things up and brings him out in the open.
WWW Full Synchro Navi/Operator Battle: Desertman.exe α
HP= 1200
Speed= slow
Defense= cover
Movement= random teleport in the two rightmost columns when hit, hands slide up and down left column to line up with Megaman
Special Field= Enemy's side is all Sand Panels, two Hands occupy left enemy column, Pillars begin in top/bottom right corners and are replaced/repositioned when Desertman moves.
Objects= Hand(60 HP, regenerates), Pillar(80 HP)
Attacks= Lion Head(80), Whirlsand(80), SandStone(120, quake effect)
 | Use aqua chips to hold him, then deal some heavy damage with a Tornado enhanced by Attack+10/30. Luckily, the only side covered in sand is his. |
Once done in there, you can NetBattle Dex and Gutsmanβ anytime since Dex isn't moving anywhere else. After avoiding a rather pointless boulder trap, Lan finds Chaud in a hot situation of his own. This robot's got the chaud Chaud surrounded in flames. Lan wastes no time and jacks in.

The first set of drones aren't too hard to find an opening for. The next set is pretty big, and you have to find your openings on the fly, there's not much chance for rest as you move through these courses. Take the southeast path at the end of the 3-drone patrol to get the "Jungle" program. When you get past the 4-drone patrol, there's a hidden Alpha on the first fork, so take the long way around. The next array may look confusing, and there's Alpha hiding in there somewhere, but my directions would be too confusing, so just go along the right-hand side and you'll be safe. You'll come to another patrol of two drones, you have to get in between them to pass through. Get the ID-DataC and head back, or have a drone take you back, head to the door and go on through. As you go downstairs, you'll see a data crystal with a FullEnergy Subchip to pick up. The next set of drones may move slow, but they're still tricky to get by. Just look hard for openings and be sure to save first. Once through, you'll meet up with glowy Anetta, glowy Match, Flameman, and Plantman.
WWW Full Synchro Navis/Operators Battle: Plantman.exe and Flameman.exe
HP= 1000, 1000
Speed= medium
Defense= normal, barrier
Movement= random teleport, Flameman does not enter far-right column.
Objects= Plantman: Vine(40 HP), Flower(80 HP) Flameman: Candle(8 HP, regenerates)
Attacks= Plantman: Rose Thorns(50), Plant Weed(40+30x2),
Red Pollen(confusion), Yellow Pollen(paralysis)Flameman: Flame Tower(60), Flame Blast(60), FanFlare(invincible while candle flame is green), Demon's Candle(HP slowly recovers while candle flame is red),
Changkey Fire(60, while candle flame is yellow)
 | You'll fight Plant and then Flame. This contrast of elements requires a diverse folder. Fortunately, the fact that you're fighting both is evened out by the fact that both are merely their V1 forms. Besides the fact you can't use an all-stronger-element folder against both of them, you can still delete them quickly with the regular strategies. For Plantman, GrassStage then HeatSpread. For Flameman, steal the first column and he's practically helpless. |
Almost done now. In the next room, inpect the wires at the back to find a hidden door. Lan takes a deep breath a little too early as there's still one more robot between you and Wily. This one is equipped with a drill. Drillman demands you jack in and face him, so here we go.

You've seen this first drone patrol pattern before, just don't try waiting in the third or fifth nubs since they're Alpha traps. For the second drone, there are nubs on each side of the path to hide in, but one hides Alpha. So take the left and then the right hiding spot to get by. Next platform has two quickly converging paths again, the right one is a trap. Take the 1400Z and move on. The next couple of drones require quick thinking to get by since conveyer belts force you into their path. You've reached the midpoint now. Head right and get through the next circle of drones. Ignore the teleporter for the moment and take the right path. These next two drones aren't even a challenge to surpass, just dont's step on the leftmost nub since Alpha is hiding there. Get the ID-DataD over here and head back to the teleporter. You could go right through the door now, but head left first and get the HPMemory on the northwest path past these drones. Alpha's hiding in the middle of the platform, but you won't have to go there. Go through the door and you'll have one more wave of drones to surpass. It's literally a wave. You just have to take a leap of faith at the right time. Now to face Drillman again.
WWW Navi Battle: Drillman.exe
HP= 600
Speed= fast
Defense= cover
Movement= shoots straight into the sky then goes into attack mode. Returns to the ground momentarily when hurt or stunned.
Objects= Drill Bit(10 HP, shielded)
Attacks= Drill Missile(80), Triple Hole(80x15), Subterranean Strike(80, breaks panels), Rockfall(60)
 | I guess they thought Drillman Alpha would still be too hard at this point. It's the exact same battle you fought at the end of the last chapter. You should be able to handle it just fine. |
Drillman tries to pull a self-destruct, and Megaman's too damaged to do anything about it (yeah, even if you fought a flawless battle, you'll still be damaged now, apparently). Protoman shows up and makes an heoric rescue. Now it's time to jack out and go onto the final battle. Surprisingly enough, Chaud won't let you battle him now. He says they can settle this afterwards at Hades Isle...hmm, keep that in mind.
Beyond that door is the point of no return, so save now. Lan goes through the door and comes face-to-face with Lord Wily. The WWW operatives are here too, slumped in their Pulse Transmission chairs, seemingly dead (don't worry they're just sleeping). Alpha is stored in a big plasma ball thing above Wily's head. Wily mocks Lan's hopeless situation, since there are no jacks in the room, he can't delete Alpha. I guess Wily doesn't think Lan would try Pulsing In with Inukai's vacant PTS Chair. Wily then Pulses himself in to become Alpha's brain and basically leaves Lan alone in his inner sanctum. Smart Wily, smart.

Lan Pulses In and glowy Lan comes face-to-face with Rock in the cyberworld. He notes that it's like a dream and is suddenly reminded of the omen he had at the beginning of the chapter. Nonetheless, he puts it out of his mind and goes into Full Synchro with his navi. Now you just have to make your way north. You may have to fight some AlphaBugs as well as other enemies on the way. There are no items to pick up in this gooey network, so just make a beeline northeast.
Glowy Wily and Bass stand before a big, glowing pillar. This is the Guardian that prevents Alpha from being activated. Only Bass can destory it with his power. Wily tells Bass to blast and absorb it so he can become all-powerful. Bass is a little suspicious of Wily's self-destructive wishes, but his eagerness to become invincible is more important. He blasts Guardian, absorbs it, and begins shimmering. This is prime time for Lan and Megaman to show up. Bass wants to test-run his ultimate power, so get ready for the penultimate battle.
Dark Navi Battle: Bass.exe
HP= 1000
Speed= fast
Defense= barrier
Movement= random teleport.
Attacks= AirBurst(100), Mini-Explosion(100x6), Explosion(100x15), EarthBreak(100, breaks panels),
Aura(100 damage threshold barrier that regenerates)
 | Guardian didn't seem to improve him a whole lot. In fact he's technically weaker than he was at the end of chapter 6...Maybe he's conceptually stronger, but Lan and Megaman's Full Synchro just makes it look like he's a lot weaker? Well, in any case this guy is easy to beat. Bring down his aura and pummel him with your best chips. For the first half he'll use an uncharged mini-Explosion after every three AirBursts. When his HP gets below 500, he'll replace the mini version with alternating full-charged Explosion attacks and EarthBreak. Just step one column back when EarthBreak happens, he drops his aura automatically when using it, so you don't even have to waste chips on the aura at that point. Prize is 2000Z. |
Bass is a little confused. Wily shows his true colours and tells Bass how he used Gospel to make Copy Basses just to destroy Guardian. Bass's hatred for humans is renewed by this. Before anybody can do anything about it, the ground shakes and Alpha awakens. Both Bass and Wily are instantly swallowed by the red goo. Then the core of Alpha itself appears and it's up to you to face it. Final battle routine set! Execute!
Final Battle: Prototype Alpha
HP= 2000
Speed= fast
Defense= barrier, armor
Movement= confined to center of enemy area.
Special Field= Leftmost enemy column cannot be stolen or broken. Claws occupy upper-left and center-right enemy panels when not attacking.
Objects= Amoeba Shield(2 layers of 20HP, regenerates, heals), Claw(invincible, shielded),
Missile(500 HP), Spike(500 HP)
Attacks=Claw Swipe(50), Shoulder Gun(20x12), Red Eye Delete(80, cracks panels),
Alpha Arm Σ(60x16), Alpha Arm Ω(100)
 | You have to deal damage to its shell before the core is exposed so you can take HP. The Amoeba Shield is a tricky customer. It's like Alpha has two 20HP Barriers, so even if you hit it with a 500 dmg attack right off, the first layer goes down while the second (and Alpha's HP) remain untouched. You can tell when the first layer goes down when the ooze around the core gets darker and dents inward. To make things trickier, the barrier slowly regenerates HP so the longer you wait between attacks, the more hits you'll need to bring it down. Tornado is perfect for bringing down the Amoeba Shield with the first two hits and damaging Alpha with the other six. When a layer regenerates, it starts with low HP and slowly builds back up, so don't give it the chance. Use regular buster shots often to keep the core exposed. The claw attack is easy to dodge when you get the rhythm of it, just step back and up, forward and down. For the shoulder gun, you'll have to move really fast to stay a step ahead of the bullets. For the laser, avoid it by staying in the back corners. The newly cracked panels serve to make it harder to dodge the other attacks, which now repeat. It uses an Alpha Arm attack in place of Shoulder Gun after its HP drops below half. You gotta step back and forth between the middle row and a side row pretty quickly to dodge A.A.Σ. Move to the rightmost corners to avoid A.A.Ω. Just try your best and use both attack and recovery chips to make it through this battle. |
Now the ending. Can't say too much about it. Let's just sum it up like this: Lan and Megaman meet Dr. Light Grandpa Tadashi Hikari. After a brief reunion and congratulations, Dr.Sr. gives you a note for Dr.Jr. and now you have to escape. You'll end up in control of Megaman one more time as you have to run to the entrance of the network. Lan makes a narrow escape but ends up being separated from Megaman (damned prophetic dreams). Everyone else heads back to the beach for the obligatory final reunion of all the other main characters. Chaud manages to get a smidgen of affection out of his father and is just tickled pink about it. Chisao's still being cute, Mayl's still being obsessive over Lan, Chaud's still being passive agressive towards Lan, Lan's still being oblivious to any of these emotions directed at him, and Tora makes like a one-shot pseudo-main character and walks off into the sunset never to be heard from again. Dr.Hikari goes philosophical over the loss of Megaman. Shun or Sean or whatever his name is and Mamoru show up to give some words of encouragement too. Four months pass and Lan's had to spend them without Megaman. Lan is ready to go on with a new navi, but will never forget Megaman. That's too bad. Dr.Hikari manages to decode Gramps' Letter and finds it points to a safe spot within Alpha's core, and guess who found his way in there 4 months ago? (It's MegaMan's series, you didn't think he'd die NOW, did you? Capcom still has to milk it for a few more sequels.)

Well, that's the end of this game...or is it? The answer is no. There's still that hole in the Undernet server that required a Star ID. Beating the game just earned you that Star ID. There's also Chaud and Protoman who are still waiting for a fight at Hades Isle. And what's with the ominous black screen dialogue right after the end credits?
Someone:...Where...Am I...? ...Am I...alive...?
Something:...Grrr...Growwwll...
Someone:...What do...you want...?...Will you save me?
Something:...Grrr...Roarrr!!
You know the Drill! Stay tuned as the real challenge is just about to begin.
~Raijin