 Annihilation
Miscellaneous Data
|
HP Memory RegUp SubMemory Key Items Shops |
Number Trader Quiz Gambling BugFrags Simon Says |
Defense Trades Extra Folders Request Board Other Things |
Each HPMemory item you find will add 20 to your max HP. As usual, you start with 100 HP and can collect 45 of these items to get up to 1000 HP. Use NaviCust HP+ blocks and EX Codes to get even higher HP.
1-2. ACDC2 Shop - 1000, 3000 Z (ch1)
3-4. ACDC Square Shop - 2000, 5000 Z (ch1)
5-7. SciLab Square Shop - 2000, 4000, 8000 Z (ch2)
8-10. Yoka Square Shop - 4000, 8000, 12000 Z (ch3)
11-13. Beach Square Shop - 5000, 9000, 13000 Z (ch4)
14-16. UnderSquare Shop - 12000, 16000, 20000 Z (ch7)
17-19. Undernet4 Shop - 8000, 12000, 16000 Z (ch7)
20-22. Secret2 Shop - 20000, 30000, 40000 Z (ch9)
23. Reward for Request Board job 4: "Transmission Error" (ch3)
24. Reward for Request Board job 6: "I'm broke...!" (ch4)
25. Reward for Request Board job 11: "Stuntmen wanted!(Tora)" (ch5)
26. Reward for Request Board job 22: "Finding the blue Navi" (ch8)
27. Locked Mystery Data in Mayl's HP (ch1)
28. Mystery Data in School Server Comp (ch1)
29. Mystery Data in Principal's PC 2 (ch1)
30. Mystery Data in Numberman Sign Comp (ch3)
31. Mystery Data in ACDC Tank Comp (ch8)
32. Mystery Data in ZooComp1 (ch2)
33. Mystery Data in Yoka2 (ch3)
34. Mystery Data in Editing Room Comp (ch5)
35. Mystery Data in HospComp2 (ch5)
36. Mystery Data in HospComp5 (ch5)
37. Mystery Data in Undernet3 (ch5)
38. Mystery Data in Undernet5 (ch7)
39. Mystery Data in Undernet7 (ch9)
40. Mystery Data in Secret2 (ch9)
41. Mystery Data in WWWComp1 (ch8)
42. Mystery Data in WWWComp4 (ch8)
43. Hades Isle - inspect the crab on the side of the ramp leading onto the boat. (ch4)
44. Hospital 3rd Floor - inspect the tree trunk. (ch5)
45. Prize for beating the QuizMaster behind Ura Inn. (ch7)
Each RegUp item you find will add the given amount of MB to your Regular Memory. The Regular Chip is assigned while folder building. Press Select when pointing to a chip in your folder that has MB capacity less than or equal to your Regular Memory and it will be highlighted red. Then each battle will start with that chip in the first slot on your Custom Screen. Your default Regular Memory is 4MB, and with these 10 RegUp1s, 12 RegUp2s, and 4 RegUp3s you can raise it up to 50MB. You can use the Reg+5 NaviCust blocks to raise this slightly.
3 - Reward for Request Board job 2: "My navi is sick" (ch2)
3 - Reward for Request Board job 10: "Look for friends(Tora)" (ch5)
1 - Mystery Data in 5A Blackboard Comp (ch1)
2 - Mystery Data in Yai's HP (ch1)
1 - Mystery Data in Principal'sPC1 (ch1)
2 - Mystery Data in ACDC Tank Comp (ch8)
2 - Mystery Data in SciLab Vending Machine Comp (ch2)
2 - Mystery Data in SciLab2 (ch2)
1 - Mystery Data in Zoo Ticket Machine Comp (ch2)
1 - Mystery Data in Zoo Alarm Comp (ch2)
2 - Mystery Data in ZooComp4 (ch2)
3 - Mystery Data in Beach1 (ch4)
1 - Mystery Data in TV Station Door Panel Comp (ch5)
2 - Mystery Data in Hospital Bed Comp (ch5)
1 - Mystery Data in HospComp1 (ch5)
2 - Mystery Data in Undernet2 (ch5)
2 - Mystery Data in WWWComp2 (ch8)
2 - Classroom 5B - inspect the bookshelf by the blackboard. (ch3)
1 - Ura Inn Room - inspect the jars. (ch3)
1 - TV Station 1F Hallway - inspect the props along the wall. (ch4)
2 - Outside Hospital - inspect the stone monument. (ch5)
1 - SciLab Metroline Station - inspect the trash can. (ch6)
1 - School Teachers' Lounge - inspect the first row of desks. (ch7)
2 - TV Station Editing Room - inspect the recording schedule. (ch7)
2 - WWW Base - inspect the graph monitor in the first room. (ch8)
3 - Prize for beating Mr.Quiz in the Ura Inn hallway. (ch4)
Each SubMem item you find will increase the number of each type of SubChip you can carry at a time. You can originally carry 4 of each SubChip. Collect all four of these items to carry up to 8 of each SubChip.
Mystery Data in Ura Inn Armor Comp (ch2)
Mystery Data in Undernet6 (ch5)
Mystery Data in HospComp3 (ch5)
Reward for Request Board job 15: "Looking for condor" (ch6)
For locations of Programs, ExpMemory, Spin(Color), and other items related to the NaviCust, see the NaviCust page.
| PET - | Megaman's home. You have it from the start. |
| O Data - | Data used in the N1 entrance test to answer "True". Found during Chapter 1. |
| X Data - | Data used in the N1 entrance test to answer "False". Found during Chapter 1. |
| Parasol - | Convnient light-blocking device found during Chapter 1. |
| KeydataA,B,C - | Data pieces for opening the gate in Principal's PC 1. |
| PasswrdA,B,C - | Data pieces for opening the gate in Principal's PC 2. |
| SubPET - | A crappy temporary PET used when the regular one breaks down. Used in Chapter 2. |
| Bag - | Higsby's supplier lost his bag. You find it for him during Chapter 3. |
| OrderSys - | The above Bag contained Higsby's new Order System. Deliver it to Higsby. |
| PresData - | The data used to create the Press Program. Acquired in Chapter 3. |
| Needle - | A special magic needle used to pop Bubbleman's special magic bubbles. Acquired in Chapter 3. |
| DataDisk - | Contains Dr.Hikari's work data. Delivering this gives Lan a reason to go to SciLab in Chapter 4. |
| PET Case - | An accessory given to Lan by his father in Chapter 4 that allows the PET to be thrown in water and into people's heads. |
| HadesKey - | Key data used to unlock the door in Hades Network during the N1. |
| VictData - | Victory Data hidden in Hades Network acquired to pass the first round of the N1. |
| InsrData - | Insurance Data lost and found as per Request Board job 13: "Gathering data(Tora)" in Chapter 5. |
| TickStub - | Ticket stub delivered as per Request Board job 10: "Look for friends(Tora)" in Chapter 5. |
| Tally - | A token that grants access to the Undernet, rewarded for Request Board job 12: "Riot stopped(Tora)" in Chapter 5. |
| Tea - | Vending machine tea to be delivered to hospitalized Yai in Chapter 5. |
| BsmntKey - | Get the Basement Key from a nurse during the hospital incident to reach the base of the Tree of Life. |
| FireData, HeatData, FlamData - | Conspicuously-named data packets Mr.Match gets Lan to install across SciLab in Chapter 6. |
| Rank 10 - | Lowest Undernet Rank, won from the navi in Hades Net in Chapter 7. |
| Rank 9 - | Next lowest Undernet Rank, handed over by the lazy navi in the Hospital Net. |
| Rank 8 - | The Undernet Rank held by a navi in Undernet3, and briefly by Beastman. |
| Rank 7 - | Undernet Rank held by the philosophical navi in the Principal's PC. |
| Rank 3 - | Copyman's Undernet Rank. |
| Rank 2 - | Mistman/Bowlman's Undernet Rank. Acquire all these Ranks in Chapter 7. Throw the Undernet's order out of whack. |
| Origami - | An origami bird in Mamoru's hospital room used to solve Rank 7's riddle. |
| GigFreez - | The Forbidden Program GigaFreeze, acquired from the UnderKing through the ordeals of Chapter 7, then promptly defused by Bass. Damnit! |
| OfclPass - | A Pass carried by Officials to allow them to use the Metroline during the Martial Law in Chapter 8. |
| DadsNote - | A note left by Dr.Hikari in Chapter 8 when he escapes from the hospital to study Alpha. |
| CardKey - | Opens the door to Dr.Hikari's office in SciLab, left with the above DadsNote. |
| Aspirin - | Pain medication for Dr.Hikari's burns that needs to be delivered to him in Chapter 8. |
| ID-DataA,B,C,D - | Data used to open the doors in the WWW Network during Chapter 8. |
| GramNote - | Grandpa Hikari's encrypted note for his son, delivered during the ending. |
| Old Tool - | To be delivered to a navi for Request Board job 1: "Please deliver this". (ch2) |
| CashData - | Recovered for the client of Request Board job 6: "I'm broke...!". (ch4) |
| Old Doll - | A toy that looks disturbingly like Chisao used to lure in the escaped condor in Request Board job 15: "Looking for condor". (ch6) |
| WWW-ID - | Reward for Request Board job 16: "Help with rehab". (ch6) |
| SkyTome, LandTome, SeaTome - | Data found and returned to the client of Request Board job 20: "Legendary Tomes". (ch8) The assembled tomes spell out a clue in katakana, "haniwa", referring to the clay figure in the the Teacher's Lounge. Inspect the figure while all three tomes are in your inventory for a bonus 300000Z. |
| StmpCard - | A card used to collect stamps for Request Board job 24: "Stamp collecting". (ch9) |
| Will - | A cryptically (i.e. vertically) written will that provides the clues for Request Board job 25: "Help with a will". (ch9) |
| Photo - | Photo Data found at the end of the above Will quest. |
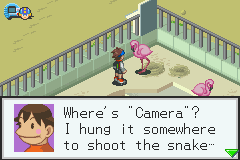
| Camera - | A Zoo patron's camera misplaced on a gorilla sign. Find and return it for the ModCode to Error C2. (ch5) |
| ModTools - | Purchased from an Ameropean on Beach St. Allows you to input ModCodes and EX Codes with your NaviCust. |
| Hammer - | The legendary Hammer of S, used to break the monoliths barring your way in the Secret Area. Found high in Undernet7. |
| WrstBand - | Mr.Famous' signature wristband that you never see him wearing because of his lab coat. Used to power up the Punk NaviChip that you can't legitimately obtain because it was a Japanese convention exclusive. Worthless, but easy to obtain. Number Trader Code 90690648. |
| Rank 1 - | Serenade's top Undernet Rank. Won from the battle with him in the Secret Area quest. |
| Spin(Color) - | Items used to rotate NaviCust blocks of the indicated color. See the NaviCust guide. |
| MaylCode - | Opens Mayl's homepage's security cube in ACDC1. Given in an e-mail right when you need it in Chapter 3. |
| DexCode - | Opens Dex's homepage's security cube in ACDC1. Given in an e-mail at the end of Chapter 1. |
| YaiCode - | Opens Yai's homepage's security cube in ACDC2. Given by Yai in preparation for the chat in Chapter 1. |
| TamaCode - | Opens Tamako's homepage's security cube in Yoka1. Given by Tamako for beating her in a friendly netbattle after her defeat in the N1. |
| HospCode - | Opens the security cube in Beach1 that leads to an isolated spot in HospComp2. Given by Mamoru in Chapter 6. |
| ACDCPass, SciPass, YokaPass, BeachPass - | Tickets picked up and used in the Metroline to travel from location to location. |
| CACDCPs - | A permanently-held cyber-ticket for the online version of the Metroline. Lets Megaman travel to the station in ACDC1. Given by the N1 prelim examiner in Chapter 2 to allow him to go back home. |
| CSciPass - | The cyber-ticket to allow Cyber-Metro travel to the station in SciLab2. Given by Sunayama in Chapter 2 for the N1 prelim. |
| CYokaPas - | The cyber-ticket to allow Cyber-Metro travel to the station in YokaSquare. Given by the girl navi in Chapter 3 to reach the last N1 prelim. |
| CBeacPas - | The cyber-ticket to allow Cyber-Metro travel to the station in Beach2. Given by e-mail from DNN in Chapter 4 for a pre-N1 interview. |

Most NetDealers give you chips and HPMemory for the Zenny you pick up everywhere in the game. Program Dealers (usually represented by an Official-type Navi) supply Programs for the NaviCust. There are a couple shops that take BugFrags as currency instead of Zenny. In any case the shop usually has between one and three of each item and can be sold out. White and Blue version shops have different chip inventories as well. SubChip Dealers (usually represented by a purple Normal Navi) are the only ones with an inexhaustible inventory. Higsby's Chip Order may be sold out of a chip if you already possess the allotted amount of that item, but the inventory will be replenished if you lose those chips through trades or chip traders.
SubChips
ACDC Town
|
ACDCSquare
|
SciLab
|
Yoka
|
||||||||||||||||||||||||||||||||
Yoka Square
|
Beach2
|
Hospital TV Comp
|
WWW Wall Comp
|
NetDealers
Differences are color-coded White Version and Blue Version.
ACDC2
|
ACDC Square
| ||||||||||||||||||||||||||||||||||||||||||||||||||||||||||||||||||||||||||||||
SciLab Square
|
Yoka Square
| ||||||||||||||||||||||||||||||||||||||||||||||||||||||||||||||||||||||||||||||
Yoka1 Bug Trader
|
Beach Square
| ||||||||||||||||||||||||||||||||||||||||||||||||||||||||||||||||||||||||||||||
Under2 Bug Trader
|
UnderSquare
| ||||||||||||||||||||||||||||||||||||||||||||||||||||||||||||||||||||||||||||||
Undernet4
|
Secret2
| ||||||||||||||||||||||||||||||||||||||||||||||||||||||||||||||||||||||||||||||
NaviCust Program Shops
Beach Square Programs
|
UnderSquare Programs
|
Under6 Bug Programs
|
Higsby's
| Elec+30 * | 5000 | 1 | Recov80 * | 5000 | 1 |
| TimeBomb M | 6000 | 1 | RedWave J | 7500 | 1 |
| StandOut * | 6000 | 1 | |||
| WaterLine * | 6000 | 1 | |||
| Lightning * | 6000 | 1 | |||
| GaiaSword * | 6000 | 1 | |||
| AirSword R | 14000 | 1 | Mine R | 10000 | 3 |
| OldWood W | 40000 | 1 | Anubis A | 80000 | 1 |
Higsby's regular stock (above) is like any NetDealer except four of the chips are available in both versions, and there are no HPMemories for sale. His Chip Order system, which becomes available in Chapter 5, works a little differently. Chip Order stock includes every chip in the Library but each chip only becomes available once it has been entered in your Library. Stock can run out if you already have enough of that particular chip, but if you lose them the stock will replenish. The pricing list is too large to post here, but I will integrate it into the Library section eventually.

Higsby's Number Trader gives out various items for certain codes. Buying chocolates in Yoka Station gives you a random number for the trader but there's no guarantee the number will give you anything. These are the numbers that will work:
| Number Code...... | Item |
| 21247895 - | HiCannon * chip |
| 15789208 - | AirShot3 * chip |
| 31549798 - | Spreader * chip |
| 63997824 - | VarSword F chip |
| 76889120 - | StpCross S chip |
| 95913876 - | GtStrght S chip |
| 01697824 - | CopyDmg * chip |
| 50098263 - | Muramasa M chip |
| 03284579 - | HeroSwrd P chip |
| 65497812 - | Salamndr * chip |
| 88543997 - | Tsunami * chip |
| 54390805 - | Thndrblt * chip |
| 33157825 - | GaiaBlde * chip |
| 19878934 - | SetSand Navi Customizer Block |
| 23415891 - | Airshoes Navi Customizer Block |
| 41465278 - | WpnLV+1 (W) Navi Customizer Block |
| 67918452 - | FastGauge Navi Customizer Block |
| 11002540 - | SpinBlue Key Item |
| 28274283 - | SpinGrn Key Item |
| 72563938 - | SpinRed Key Item |
| 77955025 - | SpinWht Key Item |
| 57789423 - | MiniEnrg Subchip |
| 86508964 - | MiniEnrg Subchip |
| 56892168 - | FullEnrg Subchip |
| 99826471 - | FullEnrg Subchip |
| 24586483 - | SneakRun SubChip |
| 05088930 - | Untrap Subchip |
| 46823480 - | Untrap Subchip |
| 87824510 - | LockEnmy Subchip |
| 35331089 - | Unlocker Subchip |
| 90690648 - | Mr Famous's Wristband Key Item |
There are four real-world NPCs that will offer to give you a quiz when you talk to them. If you get a question wrong you may try again from the start of the quiz as many times as you want until you get them all correct and win the prize. Once all four questioners are conquered, the Door Of Knowledge in Secret1 will open allowing you to retrieve a StepCross R.
|
Mr.Quiz Inn Hall, Ch4 1."3" holes in park mtn 2."Met" on Virus Lab screen 3."9" kanji pages 4."380" for coffee at Beach 5."3" pandas in booth Prize = RegUp3 |  |
| QuizMaster Inn Back, Ch7 1.5B won the "8th" Breeder Challenge 2."Lion" pours the water. 3."2" gas bottles next to stand. 4."Stuffed Animal" is not in Mayl's room. 5.Panda looks "backward". 6."3" people statues in zoo. 7."Teachers" have newest blackboard. 8."3" Gold shield displays in office. 9."300Z" for lotto ticket. 10."Clay Statue" in school. Prize = HPMemory |  |
| QuizQueen Beside OR,Ch8 1."Shadow" changes size throughout the day 2."Pi" is 3.1415 3.shoes + banana peel = "slippers" 4.Round on both ends and high in the middle, "Ohio" nyuk nyuk nyuk nyuk. 5."age" goes up, never comes down. 6.Mt.Fuji found in "Japan". 7.baby sheep is a "lamb" 8."Gretel" is Hansel's sister. 9."Jupiter" between Mars and Saturn. 10."Snake" lays eggs. Prize = Barrier200 E |  |
| QuizKing Hades Mtn,Ch9 1."it's free" for a kid on the Metroline. 2."160" is the atk of CannonBall. 3."5th" floor is Hikari's lab. 4."2" (legs) have you. 5."Heat" was Gutsman's endurance challenge. 6."4" girls in 5A. 7."silver gear" in Tamako's hair. 8."Robots" was Wily's field. 9."Battle Network" is the game's title. 10."Bubbly Dance" is Bubs' dance. 11.A "Beast" is Beastman. 12."Teacher" was Higsby's past occupation. 13."st.Beach" on sign at Beach station. 14."folding fans" Yai used to love. 15."Love & Loss" is DNN's TV series. Prize = Navi+40 * |  |
 In certain Comps you may encounter a Normal Navi that will offer a gambling game in which you put down an amount of Zenny, pick one panel out of a set of 2-4, and if it was the correct panel then your Zenny is multiplied according to the odds and you have the option to try again to further multiply the amount, but if you pick the wrong panel at any time, you lose everything. If you get enough consecutive wins, the navi running the game will go out of business and give you a rare chip along with you winnings. In each set of panels there will be only one winning panel randomly determined. The simplest way to play this is to save before talking to the guy and just pick the panel MM starts out on every time. Eventually you will win big, but you may want to stop on the penultimate step to keep the guy in business and continue to win massive amounts of Zenny.
SciLab Vending Machine, Ch2
- min 100Z bet on 2 panels - 200, 400, 800, 1600, 3200, 6400 & Prism H - 1/64 odds
Station Board, Ch5
- min 500Z bet on 3 panels - 1500, 4500, 13500, 40500 & StepSwrd L - 1/81 odds
Hospital Vending Machine, Ch5
- min 1000Z bet on 4 panels - 4000, 16000, 64000, 256000 & GutStrgt O - 1/256 odds

In MMBN2, BugFrags were introduced as a finite commodity, mostly found in hidden mystery data. In this game there is an unlimited amount of BugFrags but they are still rare and not too easy to come by. BugFrags may be exchanged for chips or Programs at certain shops (see shop list), they may be fed into the BugFrag Trader in Secret3 for a random rare chip, or they may be fed to viruses either through the Virus Breeder system or in particular events.
The primary means of BugFrag collecting is by counter-deleting enemies. Deliver the killing blow just as the enemy attacks to earn a star next to your Busting Level at the results screen. You get a star for each enemy in the battle deleted this way. Then after the usual chip/zenny reward you'll get BugFrags according to the number of stars/counter-deletions.
* = 1BF
** = 3BF
*** = 8BF
Navi = 10BF
Countering is easier for some enemies than others. Some viruses like WindBox don't have a point in their animation cycle that allows them to be countered. Mets are easy as they can be countered just before their pickaxes hit the ground to attack. Many other enemies like Canodumb must be hit during or just after they attack. In any case, countering requires careful timing and since simultaneous counters are rare (unless enemies onscreen have synchronized attacks, like Totems) going for multiple counters is highly likely to hurt your Busting Level.
You can train yourself to try for counters in every battle, but at some point you may want to concentrate on an S Busting Level instead. To quickly build BugFrags, try repeated battles with just Mets and Canodumbs in the earliest areas of the game, or possibly friendly navi battles like Metalman or Gutsman.
Another possible source of BugFrags is...

Hanging out in CyberSquares are Normal Navis that may ask you to play a little game. No charge. With a time limit of 60 seconds, you simply have to press the indicated button on the control pad enough times to win a prize of BugFrags. You can do this as many times you desire. If you press the wrong button, the display waits a second before showing the next one and that second can cost you dearly for the higher difficulties. Some may contend this is easier than battling for BugFrags, but the quick reflexes and hand-eye-coordination required for the higher-level versions of the minigame may make the process of BF collecting take even longer.
Yoka Square, Ch3 - 60 times/min for 1BF
BeachSquare, Ch4 - 90 times/min for 5BF
UnderSquare, Ch7 - 99 times/min for 30BF
Both MM and your enemies and even objects used by both may use certain forms of defense to avoid damage, but every defense has its weak point.
 Normal - will flinch from certain attacks and does not regularly use techniques to avoid damage besides dodging. This applies to Megaman and many other navis by default.
 Armor - SuperArmor effect. Does not flinch and thus his moves cannot be interrupted normally. You may still be able to interrupt moves with paralyzing attacks or attacks that push the navi back like AirShot or GutsPunch. All viruses basically have Armor in that they don't have "getting hurt" animations. Megaman can have this with the SuperArmor NaviCust program and certain other navis like Metalman and Darkman have this in effect as well.
 Cover - Regularly makes use of objects between self and opponent to block direct attacks. You may be able to clear away objects with certain attacks (may need breaking attacks). Use indirect attacks to get around obstructions. Use object chips to form your own cover, though the objects you create with chips tend to be more fragile or less reliable than the kinds your enemies use.
 Barrier - Regularly intercepts damage with some kind of barrier that offers complete coverage. Barriers usually have a key to dispelling or surpassing them, or may be periodic and thus require you to attack with correct timing while the barrier is dropped. For Megaman, there are Barrier and Aura type chips and Shield Style that can offer you some of the most reliable defense the game has to offer, but only if you stack enough of them to have them when you need them, which naturally cuts into offensive capabilities.
 Shield - When most attacks do nothing but create a metallic clink, the target may be shielded, and thus only "breaking" attacks can damage them. Breaking attacks include a lot of heavy or metallic implements, like BreakHammer or CannonBall. You can perform your own Shielding with MetGuards, CurseShields, or Chess Pieces. The Shield and Reflect NaviCust programs let you use this type of defense as much as you want. Just be aware that a lot of enemies have breaking attacks. Beware that any physical contact between Megaman and an enemy counts as breaking damage to Megaman, while the enemy receives no damage. Just like any Megaman game in that regard.
 Invis - An invisible enemy cannot be seen by the player, and most attacks will pass right through them even if you don't need to know where they are to hit them. Light-based attacks like KillerSensor or Flashman's flash are the only way to strike an invisible opponent and cancel the invisibility status (such attacks also happen to count as breaking, which is why they have the reputation as "super-piercing" for their ability to go through Shield AND Invis). The Rush NaviCust program can also reveal Invis opponents during a Link Battle. Invisibility is rare among enemies, only Elebee and Dominerd viruses utilize it. Megaman can use it with the easily-acquired Invis chip, and with Shadow Style in the Blue Version. Invisibility is one of the more reliable forms of defense, but it's good to be aware of its weak points.
 Shadow - A rare defense with a somewhat obscure weak point. A Shadowed combatant appears as a dark silhouette and most attacks pass through as with Invis. Only sword-type attacks can penetrate and cancel Shadow status. For enemies, this is only used by the DarkShadow virus family, who are protected by it constantly, making battles with these viruses impossible without the right chips on hand. Megaman can use temporary Shadow defense with the Shadow chip.
 Mole - Another rare condition. Mole defense puts the user underground where most attacks directed at him will pass safely over his head. Mole's weakness is ground-breaking attacks like CannonBall or Magnum, lava panels, or other attacks that penetrate the ground like GreenRope or MetaGel. Mole has another weakness in that the user has to briefly surface and be vulnerable while attacking. The Momogra virus family and Megaman with the Mole chip are the only ones that will use this.
 Trap - Only Megaman can set Traps by using certain chips. The presence of the trap is indicated to both players as a string of question marks in the corner of the screen. There are four things in this game that may trigger the trap, but the opponent has no way of knowing which until they stumble into it. Requires some careful planning on the user's part to predict the enemy's movements, as the conditions can be very particular, but if the trap is sprung, the effects are deadly to the opponent.
 Holy - Half-Damage. Stand on holy panels or use the Block NaviCust program. It's not great coverage, but can slow the enemy down and be harder to defeat entirely. If you're up against holy panels, pack your own stage-altering chips to get rid of them.
 Invincible - Just can't be harmed. Combatant usually glows green while this is in effect. It's only ever temporary though. The easiest way for either Megaman or the enemy to achieve this is by the periodic playing of the Fanfare chip / Trumpy virus. One of the BugStyle bugs puts Megaman in this status for ten seconds at the start of battle sometimes.
 Flying - Only enemies can completely benefit from this type of evasion. It involves the combatant's body being a few feet above the ground or off the battlefield where no attacks can reach. Thankfully, enemies that can do this are stupid enough to come back down to where you can shoot them from time to time. The closest Megaman can come to this is the AntiDamage technique which has him throw shurikens from up high as a counterattack, but that counts more as a Trap than anything. For a poor-man's flight evasion, equip AirShoes and stand on a hole panel, and at least ground-based attacks can't reach you.
Some real-world NPCs may ask to trade chips throughout the game. These trades may be very useful for completing your library. Chips gained in one trade may be traded again for something slightly better in a trading chain.
| Where | When | Give | Get | Step |
| Lounge Hall | Ch2 | SonicWave W | ElecSwrd P | |
| Class 5B | Ch3 | Bubbler C | WideSwrd C | 1 |
| Outside Inn | Ch4 | FireSword P | IceStage * | |
| TVStnHall2 | Ch5 | WideSwrd C | Recov120 S | 2 |
| SciLab Lobby | Ch6 | Shake1 S | VarSword B | |
| ACDC by school | Ch6 | Recov120 S | DynaWave V | 3 |
| TV Studio | Ch7 | Shadow J | AntiSword Y | |
| Hospital lobby | Ch7 | DynaWave V | GrabBack K | 4 |
| Editing Room | Ch8 | HoleMeteor H | Rook F | |
| Hades Isle | Ch8 | GrabBack K | ZeusHamr Z | 5 |
Extra Folders are chip folders you cannot edit, and after acquiring your first one at the same time as your NaviCust, one will always occupy the last slot of the 2-3 folders in your possession. Gaining a new Extra Folder overwrites your previous one. Extra Folders are assigned as challenges at certain points in the game and may be fun to play around with otherwise, but they are rarely as good as anything you could build on your own. Extra Folders will never have more than the default allotment of Mega/Giga Chips so if you ever make a Style Change or NaviCust edit that makes your currently-equipped Folder break the capacity rules, your Extra Folder will be automatically equipped until the other is fixed to conform to the new restrictions.
Color codes: Fire, Aqua, Elec, Wood, Breaking, Push/Pull, Steal, Defense, Recov, Enhancement, Terrain, Object.
| Name1 | OmakeFolder | YosenFolder | JigokuFolder | N1FolderA | N1FolderB |
| Name2 | XtraFldr | PreFoldr | HdesFldr | N1-FldrA | N1-FldrB |
| Original | w/NaviCust, Ch2 | Last Prelim, Ch3 | Arrival at Hades | FolderBoy on mtn. | Fan near net console |
| Copies | ACDCSquare, Ch3 | SciLabSquare, Ch4 | By Gargoyle before QtrFnls, and Yosh in Hades, Ch5 | In Hades, Ch5 | Same, Ch 5 |
| 1 | Cannon A | Ratton1 A | Bubbler A | HiCannon H | Cannon A |
| 2 | Cannon A | Ratton1 A | Bubbler A | HiCannon H | Cannon B |
| 3 | Cannon A | Ratton1 F | HeatShot B | HiCannon I | Cannon B |
| 4 | Cannon A | Ratton1 F | HeatShot B | HiCannon J | Cannon C |
| 5 | ShotGun J | ShotGun F | SnglBomb D | SonicWav G | AirShot1 * |
| 6 | ShotGun J | ShotGun F | SnglBomb D | SonicWav G | AirShot1 * |
| 7 | ShotGun J | ShotGun * | SnglBomb D | SonicWav G | AirShot1 * |
| 8 | ShotGun J | V-Gun G | CannBall D | ZapRing1 A | AirShot1 * |
| 9 | V-Gun D | V-Gun G | CannBall D | ZapRing1 A | Bubbler * |
| 10 | V-Gun D | V-Gun * | CannBall D | ZapRing1 * | Bubbler * |
| 11 | V-Gun D | SideGun Y | Burner S | Lance Z | Bubbler * |
| 12 | V-Gun D | SideGun Y | Burner S | Boomer1 H | Bubbler * |
| 13 | SideGun S | SideGun * | Burner S | Burner F | HeatShot * |
| 14 | SideGun S | Spreader M | Burner S | Invis * | HeatShot * |
| 15 | SideGun S | Spreader N | Boomer1 H | Invis * | HeatShot * |
| 16 | SideGun S | Spreader O | Boomer1 H | Sword Y | HeatShot * |
| 17 | AirShot1 * | DashAtk G | Boomer1 H | WideSwrd Y | ZapRing1 A |
| 18 | AirShot1 * | Lance H | Boomer1 H | LongSwrd Y | ZapRing1 M |
| 19 | AirShot1 * | PanlGrab Y | WideSwrd Q | LongSwrd L | ZapRing1 P |
| 20 | AirShot1 * | PanlGrab Y | LongSwrd E | LongSwrd R | ZapRing1 * |
| 21 | MiniBomb B | Guard * | FireSwrd F | FireSwrd F | Yo-Yo1 C |
| 22 | MiniBomb B | Guard * | AquaSwrd N | AquaSwrd A | Yo-Yo1 E |
| 23 | MiniBomb B | Guard * | ElecSwrd V | ElecSwrd E | Yo-Yo1 G |
| 24 | MiniBomb B | Guard * | BambSwrd W | BambSwrd W | Yo-Yo1 * |
| 25 | Sword L | Sword Y | Recov80 D | VarSwrd C | Recov30 F |
| 26 | Sword L | WideSwrd Y | Recov80 D | AreaGrab * | Recov30 H |
| 27 | Sword L | LongSwrd Y | Atk+10 * | AreaGrab * | Recov30 M |
| 28 | Sword L | Atk+10 * | Roll | Roll | Recov80 D |
| 29 | WideSwrd L | Atk+10 * | Gutsman | Flashman | Roll |
| 30 | AreaGrab L | Atk+10 * | GutsmanV2 | Beastman | Gutsman |
| Combo the AreaGrab and Swords, otherwise a simple low-level attack folder that mostly only allows picking multiples of the same chip each turn. | H-Burst and LifeSwrd. More different chip combos than Xtra. | Cumbersomely multi-coded. Strong Fire presence. Some variety, but will usually only be able to make one attack per turn. | Strong attack folder with Z-Cannon2, LifeSwrd, Varswrd, and navis, but quite multi-coded. | Weak attack, but many * codes. Z-Cannon1. Multi-coded defense. |
| Name1 | N1FolderC | N1FolderD | Folder2 | MinaraiFolder | MeijinFolder |
| Name2 | N1-FldrC | N1-FldrD | Fldr2 | ApprFldr | FamFoldr |
| Original | Scientist near doors | Moron near boat | Tora after jobs | ACDC Offcl,lastday | TV lobby,Ch9 |
| Copies | near console, Ch5 | in Hades, Ch5 | |||
| 1 | MiniBomb * | Sword Y | Ratton1 H | AirShot1 * | ZapRing1 A |
| 2 | MiniBomb * | Sword Y | Ratton1 H | AirShot1 * | ZapRing1 A |
| 3 | SnglBomb H | Sword Y | Ratton1 H | AirShot1 * | MetaGel1 C |
| 4 | SnglBomb H | Sword Y | Ratton1 H | AirShot1 * | MetaGel1 C |
| 5 | SnglBomb H | WideSwrd L | ZapRing1 S | GutPunch D | MetaGel1 C |
| 6 | SnglBomb H | WideSwrd L | ZapRing1 S | GutPunch D | Boomer1 F |
| 7 | CannBall P | WideSwrd L | ZapRing1 S | GutPunch D | Boomer1 F |
| 8 | CannBall P | WideSwrd L | ZapRing2 W | GutPunch D | Boomer1 F |
| 9 | CannBall P | PanlGrab * | ZapRing2 W | Bubbler E | Tornado T |
| 10 | CannBall P | PanlGrab * | ZapRing2 W | Bub-V E | Tornado T |
| 11 | Hammer T | AreaGrab * | IceWave1 W | BubSide E | Spice1 S |
| 12 | Hammer T | SnglBomb T | IceWave1 W | HeatShot J | Spice1 S |
| 13 | PanlOut3 * | CannBall P | IceWave1 W | Heat-V J | Spice1 S |
| 14 | PanlOut3 * | AirSrwrd R | IceWave1 W | HeatSide J | Plasma1 J |
| 15 | PanlOut3 * | ShockWav D | MiniBomb * | RndmMetr S | Plasma1 J |
| 16 | PanlOut3 * | GutPunch C | MiniBomb * | RndmMetr S | Plasma1 J |
| 17 | Recov10 * | DashAtk Z | MiniBomb * | RndmMetr S | Burner Q |
| 18 | Recov30 * | Burner Q | WideSwrd E | Plasma1 J | LavaStge T |
| 19 | Recov50 * | Ratton1 A | CustSwrd V | Plasma1 J | IceStage G |
| 20 | Recov80 * | Hammer G | Slasher D | Plasma1 J | GrassStg * |
| 21 | PanlGrab * | ZapRing1 M | Pawn E | TimeBomb K | SandStge B |
| 22 | PanlGrab * | Yo-Yo1 F | Knight U | Mine D | Fire+30 * |
| 23 | AreaGrab E | Lance H | Rook Q | RockCube * | Aqua+30 * |
| 24 | AreaGrab E | Boomer1 J | AreaGrab L | RockCube * | Elec+30 * |
| 25 | Repair * | Plasma1 B | Recov50 * | RockCube * | Wood+30 * |
| 26 | Snake I | Wind * | Recov50 * | Prism K | Flashman |
| 27 | Snake I | Fan * | Recov50 * | Prism W | BubbleMan |
| 28 | Snake I | Atk+10 * | Recov50 * | MetalMan | Beastman |
| 29 | Atk+10 * | Flashman | Atk+10 * | MetalManV2 | Flameman |
| 30 | Wood+30 * | Bubbleman | Atk+10 * | MetalManV3 | Plantman |
| Strong potential Snake combo. Good defense. Actually ideal for Quarter-Final against Gutsman. | Sword combo and Bubs+10, but half the folder is multi-coded chaos. | Spare custom folder, free chess chips | Advanced, Spread PAs with Prism, objects and Airshot, bit multi-coded | Several small combos, but multi-coded and all over the place |

The Request Board located in the SciLab lobby contains little sidequests you can tackle throughout the game. Read the details of each job listed before confirming if you want to take it on. Once you've accepted a job, you cannot accept any other jobs until the current one is complete. Completed jobs will be indicated with an OK mark. Completing a job always nets you a reward from the client that made the request. Once all jobs are complete, the Door of Trust will open in Secret2, allowing you to pick up HP+500.
Battles in missions often differ between versions. Differences are color-coded White Version and Blue Version.
| Vitals | Description |
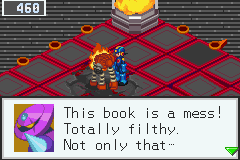
| 25 - "Help with a will" Ch9 Meet: Classroom Hallway Reward: Recov300 R | Girl needs to decipher Will. Read it vertically for location clues, or just follow messages from each location. Fight Omega viruses at each step. CyberSquirrel - Totem, Mushy, Needler. All grass or grass&swamp. Inn Armor - Heavy, Basher, Volcano. Some lava. Water Heater - Pengi, Slimer, Jelly. Center ice or sides ice. Hades Gargoyle - KillerEye, EleBee, Momogra. Some holes. Under4 Pillar - 2xTwins and NO or Dominerd. Return to client with the photo for reward. |
| 24 - "Stamp collecting" Ch9 Meet: Hospital 2F Reward: StepCross Q | Nurse needs stamp contest prize for cousin. Go to Prog in west ACDC1 to get Stamp Card. Then go to central SciLab1, north Yoka2, and central Beach1 for stamps. Return to ACDC Prog to have prize forwarded to client. Return to client for prize. |
| 23 - "Give your support!" Ch9 Meet: Hades, by Net console Reward: 30 BF | Viruses out of control, 7-round battle. 1.Met3,MegaBunny,EleGlobe or Met3,TuffBunny,EleSphere, on ice 2. Ratty3,Swordy3,Doomer, cracked and grass panels 3.Slimest,Pengon,Shrimpy3, some ice panels 4.Yart,MoBlow,TrumpyOmega or Yurt,LowBlow,TrumpyOmega,lava 5.Totun,Goofball,Vinert, grass and swamp 6.Spikey3,Fishy2,Metrodo, some cracked, grass 7.EleHornet,Swordy3,Scuttlest, holes bottleneck center |
| 22 - "Finding the blue Navi" Ch8 Meet: Undernet2 (north) Reward: HPMemory | Normal Navi "fans" wants to meet MM, it's a trap. Fight Swordy3x2 & HardheadOmega or Spikey3, Metrod, and HardHeadOmega. Gives up HPMemory upon defeat. |
| 21 - "Hide and seek!" Ch8 Meet: Front of Zoo Reward: GutsImpact H plus Sword, WideSwrd, GutPnch, and Barrier E | Kids want to play chip-trading hide&seek. Meet kid in front of zoo first, then search for 4 navis in ZooComp. Zoo1 W, purple, get Sword E Zoo2 M, Official, get WideSword E Zoo3 N, pink, get GutsPunch E Zoo4 N, heel, get Barrier E. Return to client to get reward. |
| 20 - "Legendary Tomes" Ch8 Meet: Hades Net (key spot) Reward: FastGauge * and optional 300000Z | Ghost navi wants you to get back the 3 stolen tomes from the Undernet. Sky - Under3 guy wants Magnum1 A for it. Land - Square gambler sells it for 7000Z Sea - Under6 battle Twinnestx2 and Dominerd or NO Assembled tomes spell "Haniwa", inspect the teacher's lounge statue with tomes to find 300000Z, then return them to the ghost for reward. |
| 19 - "Please adopt a virus!" Ch7VBrdr Meet: SciLab2 (middle) Reward: Bunny Family | Navi wants you to raise her viruses, but needs 50 BugFrags to prove you can feed them. Pay 50 BF to get the Bunnies. |
| 18 - "Catching gang members" Ch7 Meet: Yoka Square Reward: ExpMemory | Prog needs you to beat 4 bad navis in Yoka area. Yoka2 near lower exit - Fishy3x2 & Gloomer / Fishy2 & Ratty3. Upper road- Fishy2 & Canodumb3x2 / Fishy2 & Doomer. Yoka1 near Tamako's - Fishy3x2 & Trumpy / Fishy2 & Metrod BubbleDoor - Slimey & Fishy3x2 / Fishy, Trumpy, & Fishy2 Return to Prog for reward. |
| 17 - "Old Master" Ch7 Meet: SciLab Vnd Mchn Reward: GrabRvng Y | Used navi wants you to find "Anna Morishima" in ACDC yearbook. Find it in Teacher's Lounge. Turns out it's the Beach Café Waitress. Talk to her then return to navi for reward. |
| 16 - "Help with rehab" Ch6 Meet: Hospital Inside TV Reward: Humor and WWW-ID | Rusty Official needs to see some busting. 4 rounds, one Omega virus each. Quaker, Viney, Eleball, and PuffBall. |
| 15 - "Looking for condor" Ch6 Meet: Zoo 1 (by parrots) Reward: SubMemory | Zoo lady directs you to man in Mamoru's room with Old Chisao doll. Go to ACDC park and inspect slide to place doll. Exit and return to catch condor. Return it to zoo lady for reward. |
| 14 - "Somebody, please help!" Ch6 Meet: Principal's Office Reward: AntiRecv B | Teacher needs you to delete virus bombs in Princ'sPC. Can defuse them by answering educational question. Bookshelf - Red - Spikey3x3 or Spikey3&Spikey2x2, Statue - Wood - Totemx2 & Metrid or Volcano,Spikey,Metrod, Server - 0 - Swordy2x3 or Spikeyx2&Swordy2. Virus battles have bomb objects in them. Talk to lady for reward. |
| 13 - "Gathering data(Tora)" Ch5Tora Meet: Teacher's Lounge Reward: SlowGauge * | Teacher needs you to recover insurance data. Find Prog in south SciLab1 to learn he dropped it in ACDC. Find purple navi in ACDC2 school gate and trade him Yo-Yo1 G for it. Return to client for reward. |
| 12 - "Riot stopped(Tora)" Ch5Tora Meet: TV Station Lobby Reward: Tally | Sore losers spreading viruses around station. Jackin to Van, Door lock, and Netbattle console to delete them. See walkthrough. Return to client for reward. |
| 11 - "Stuntmen wanted!(Tora)" Ch5Tora Meet: (lower east) Beach1 Reward: HPMemory | DNN needs stuntnavis. 5 round virus battle. See walkthrough. |
| 10 - "Look for friends(Tora)" Ch5Tora Meet: ACDC Park Reward: RegUp3 | Man wants to locate friend. Find "hey" navi in west Yoka1 to learn op's working in zoo. Give stub to vet then return to client for reward. |
| 9 - "Will you deliver?" Ch5 Meet: Front of Inn Reward: Aqua+30 * | Old lady has you deliver TimeBomb N to guy in TV Station, return to her and she gives you correct chip, Invis * and you have to take it to navi in ACDC Square. Return to her again to get reward. |
| 8 - "Be my boyfriend!" Ch5 Meet: Beach Square Reward: StepSword O | Pretend you're her date. Basically a quiz. Answers are "Drama", "Metro", and "Sure". Any time you pick wrong you fight Fishyx2 & Fishy2 or Fishyx2 & Dominerd2. Get reward when done either way. |
| 7 - "Rare chips for cheap!" Ch4 Meet: Inside Telephone (Yai's) Reward: 10000Z | Thief disguised as Official lures victims to rob. Fight Twinner x2 |
| 6 - "I'm broke...!" Ch4 Meet: Inn Lobby Reward: HPMemory | Guy needs 8000Z, return to him and you need to find his lost navi in Yoka2, rescue him from Heel with Shaker x3 or Shrimpy2, Spikey2, and Ratty2, then take CashData back to man, get 8000 back plus reward |
| 5 - "Chip Prices" Ch3 Meet: ACDCSquare Reward: Slasher B | Navi needs to know what his brother is charging for chips. Find brother in SciLabSquare, relay info to client, return to brother, then client again. Both navis lose, but client gives the chip to you anyway. |
| 4 - "Transmission Error" Ch3 Meet: Virus Lab Reward: HPMemory | Scientist has accidently sent virus data to hippo/flamingo educomp. Inspect it and fight SnowBlow and Cannodumb2 x2 or Yort, Ratty, and Ratty2, Return to client for reward. |
| 3 - "Help me with my son!" Ch3 Meet: Yoka Station Reward: SpinYellow | Pop (who looks like a woman) wants son (a navi) to stop causing trouble. Go fight him in ACDC3. Cannodumb2 and Boomer x2 or Met2, Fishy, and Boomer. Return to "pop" for reward. |
| 2 - "My navi is sick" Ch2 Meet: SciLab Station Reward: RegUp3 | Little girl needs Recov30 *. Trade it for reward. |
| 1 - "Please deliver this" Ch2 Meet: ACDC1 (Station side) Reward: YoYo1 D | Pink navi needs you to deliver Old Tool to husband in Blackboard 5A. Return to her for reward. Not "dangerous" at all, despite what the posting claims. |
The Mystery of Flameman's Tome:
Near the end of Chapter 6, after beating Flameman for the first time and then losing to Bass, try jacking back in immediately and going to the spot where Bass deleted Flameman for a somewhat spooky encounter.
He stops appearing here after you rescue Dr.Hikari from SciLab, the natural first course of action Lan is expected to take. ("We have to go see if dad is safe!...riiight after browsing the net for a while.")
If you're wondering why he has the dialogue of another NPC, it's a common deal for character sprites that are on the map but normally can't be interacted with by pressing A. Approaching Flameman as part of the storyline triggers a cutscene before you can touch him, but because the game forgets to remove him right away, you can reach him and talk to him without the cutscene interfering, resulting in this interesting exchange. You can even get the Tome from him if you happen to have a Magnum1 A, which you probably won't since those don't normally become available until the final stages. If you start the Legendary Tomes mission two chapters later and find the actual NPC to whom this dialogue belongs, he'll act like you've already talked to him. The game keeps track of the dialogue itself, not which character supplies it.
Bonus Cheatery:
By using a walk-through-walls cheat, you can have exchanges like this with lots of other NPCs that are normally out of reach. Here's an amusing sample.
Want to play around with the no-walls code? Try this. There are a whole bunch of other EXE3 codes in Sprites.INCs archives, so go there for others, but the only other "no walls" code I could find I had to complete myself.
Walk Through Walls: 32009E03 0001
Naturally, there are infinite other cheating uses for a code such as this. It's practically all you need.
Drillman's Double-Take(off):
Here's some randomness for ya. Use Plantman right at the start of Drillman's battle, followed by a RockArm.
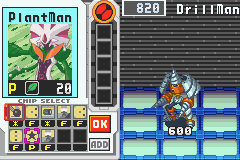
For some reason, due to the combination of the quake and being tangled in the vines, he shoots into the air twice. No practical application of this bug, it just looks funny.
YamatoSword:
Not sure if this is obvious or not, but apparently spears count as swords in this game, so Yamtoman's attacks can pierce shadow defense. Other attack attributes tend to be more obvious but I may list more odd ones if they come up.