 Annihilation
Enemy Viruses
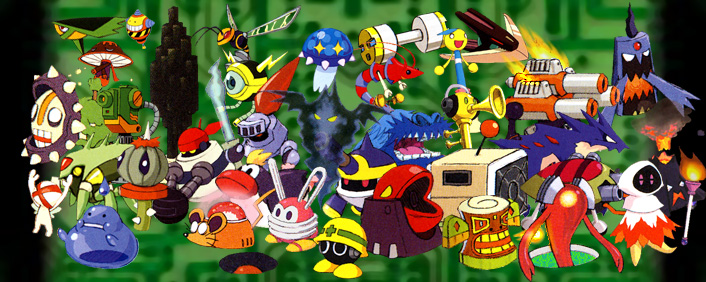
This page contains data on the minor enemies of the game; their stats, drops, locations, and secrets.
Virus Vitals:
I'll be listing the basic stats, the virus' HP and attack damage. Almost every virus has just one attack value because they have just one attack. Viruses that enter your area may collide with MM causing damage and the value will be the same, like Paraball will cause 20 points of damage whether it hits you with its Plasma attack, or with its own body. Elemental attributes are indicated with color codes:
Red - Fire
Blue - Aqua
Yellow - Elec
Green - Wood
Some viruses have elemental attacks, but not the corresponding elemental weakness, and vice versa.
Viruses are usually ground-ridden, as Megaman is by default, meaning they are susceptible to all panel types. However there are some that are visibly hovering shortly off the ground and thus are immune to certain negative panel effects as Megaman is when FloatShoes and/or AirShoes are equipped. I'll indicate at the beginning of the "Movement" field if the virus is a Floater type (FloatShoes effect - not affected by lava, ice, sand, or cracked) or a Flyer type (FloatShoes plus AirShoes - not affected by holes either). There are no viruses that just have the AirShoes effect without FloatShoes. There are some like KillerEye I've classified as Floaters that might be Flyers but since they don't move I couldn't get them onto a hole panel to check. The point is basically moot in that case though.
Viruses or accompanying objects may be protected in various ways. The most common protection is "shielding", which means most attacks will bounce off wiithout doing any damage, but breaking attacks like CannonBall or Hammer will get through. Other forms of protection have different weakpoints, like DarkShadow's Shadow defense is vulnerable to swords and Momogra's Mole defense is vulnerable to ground effects. These will be discussed in the descriptions.
Getting Chips from Viruses:
At the end of random battles you are taken to a results screen where your performance is ranked with the Busting Level 1-10 or S if you were really good and you receive a reward based on that rank. You may win either zenny or a chip, and the chances of winning a chip decrease with Busting Level to the point you will only get zenny for a Level 5 or under...unless you properly install the Collect NaviCust block which will ensure you never get zenny from battles, only chips (and if the enemy has no chips, you get nothing).
Each virus usually has just one chip to give based on its own attack. The chip's code depends on your Busting Level. You may get a particular code for a low Level (7 and under, as from getting hit a lot and deleting enemies one by one), a medium Level (7-10, as from deleting enemies one by one without getting hit), or a high Level (10-S, as from deleting enemies simultaneously without getting hit). On top of that, you get special codes if you have a Custom Style and win the battle with an S Busting Level without using the buster or Navi Chips (elemental charge shots are okay, oddly enough).
There are a few other factors which may determine the chip code you win. Some viruses give out different codes if you have low HP when you beat them (HP counter is red, incessant beeping noise is warning you MM is in critical condition). When getting an S Busting Level with Custom Style, you may also get a different code if you re-enter the custom screen before finishing the battle (usually only possible if you used FullCustom or FolderBack early on your first turn or maybe if FastGauge is in effect and the enemies are deleted right at the start of the next turn and Megaman doesn't move once.). Some viruses might just be completely random about it and give you one of two chip codes for a particular Busting Level each time. Almost ever virus also has at least one code that you can win in the White Version and a different code you can win in the Blue Version to encourage trading between the versions.
In the table below, codes will mostly be sorted by the Busting Level range they may be awarded for. Color codes and brackets indicate further conditions:
Green - No conditions. Chip may be acquired in either version.
Grey - White Version exclusive.
Blue - Blue Version exlcusive.
(Parentheses) - Finish the battle with low HP.
[Brackets] - Custom Style S Busting Level, re-enter the Custom Screen at least once before finishing the battle.
If two codes with the same conditions are listed side-by-side in the same column, it means which one you get is randomly determined.
Virus Locations:
For the most part I will only be listing locations where the virus can be encountered randomly. I'll only list one-time event battles for viruses that can't otherwise be encountered randomly, like for Omega-level viruses. I'll also use color codes to indicate special conditions needed to find them:
Red - Equip OilBody.
Blue - Equip Fish.
Yellow - Equip Battery.
Green - Equip Jungle.
Purple - Navi Ghost's entourage. Defeat this area's Navi Ghost's V2 version at a specific point elsewhere on the net to unlock their V3 version as a random encounter here along with encounters of this virus. Other conditions needed to encounter the navi must be in effect, i.e. SneakRun must be in effect to encounter Spikeys in Lan's DogHouse, the NaviCust must be bugged to encounter DarkShadow in Undernet6, etc.
Grey - Event Battle, for viruses that may only be encountered in one-time situations.
Elemental attractors may not be completely necessary to encounter viruses highlighted as such, but it should greatly increase your chances. For example, in the GiraffeEduComp two out of the eight possible encounters contain Mashy and the other six contain no wood-elementals. Without Jungle equipped you have a 25% chance of running into Mashy, but if you really want to find Mashy you might as well install Jungle and make that 100%. In some cases the Attractor IS completely necessary, for example you will never encounter HotHead in the SciLab DoorSensor or Trasher in the ACDCTank without OilBody installed. Then there are annoying cases where installing the attractor doesn't guarantee you an encounter but at least marginally increases the odds. For example, Volcanest is in just one of Secret3's 16 possible encounters, and installing OilBody only increases your 1/16 chance to 1/5 due to all the other fire-types in that area. Still better than nothing. I won't bother highlighting for Attractors when it won't make a big difference, like Spikeys have about a 50% chance of showing up in any ZooComp screen. You might use OilBody to increase that to 100% but it's not like you'll have a lot of trouble finding them without it. There are also a few viruses that may be attracted by association, like Momogra obviously isn't a a wood-type, but in WWWComp1 it only appears in one encounter alongside a rare Viner so equipping Jungle is still making a big difference in finding it there.
| Virus | Name | HP | Atk | Extra Info | Chips/BustingLvl |
Locations | |||
1-7 |
7-10 |
10-S |
Cust S |
||||||
 |
Mettaur (Metool) |
40 | 10 | Guard * |
H,D |
J |
L,R |
Blackboard, DogHouse, Mayl's, Dex's, ACDC, SchoolServer, Prncp'sPC, LabDoor, InnTV, InnArmor, Tamako's, ZooTicket, ZooAlarm, ZooComp1-2, NumberStandee | |
| Mettaur2 | 60 | 40 | Guards | Guard * |
W,I |
M,S |
G |
Mayl's, LabComp, InnTV, InnArmor, ZooTicket, ZooAlarm, ZooComp, NumberStandee, Yoka, Beach2, NetBattleMachine, TVStationPanel, EditingComp, HospComp | |
| Mettaur3 | 120 | 80 | Guards | Guard * |
N,T |
E,Q |
BigWave M,E [Y,P] |
InnTV, TVStationPanel, Under4-7, WWW4, Secret1-2 | |
| MettaurΩ (MetoolSP) |
160 | 150 | Guards, Cracks |
n/a |
BreederBattle, UnderRanking-Prelim, GutsSP, DrillSP | ||||
| Moves: | Vertical adjacent teleport, attempts to line up with MM. Shielded when hiding under helmet as other Mets attack. | ||||||||
| Attack: | Ground-based Shockwave travels down the row, piercing obstacles but stopping at holes. Omega level cracks panels the wave passes over. | ||||||||
| Bio: | The classic basic fodder enemy. Groups of Mets will take turns attacking. Versions 2 and up will protect themselves under their shielded helmets while waiting their turn, but will occasionally peek out if it's taking too long for their partners to get a bead on you. Easy on their own, but as a group they may make it difficult to take them out any way but one at a time. Mets are the only viruses that will give you more than one type of chip without Custom Style S Busting Level. With low Busting Level you get MetGuard *, regardless of the version. If you do have Custom Style, you can also get the rare BigWave chip from Met3. | ||||||||
| Virus | Name | HP | Atk | Chips/BustingLvl |
Locations | |||
1-7 |
7-10 |
10-S |
Cust S |
|||||
 |
Canodumb | 60 | 10 | B,E |
A,D |
C |
* |
Blackboard, DogHouse, Yai's, Mayl's, Dex's, ACDC, SchoolServer, Prncp'sPC, LabDoor, LabComp, SciLab, Tamako's, ZooAlarm |
| Canodumb2 | 90 | 50 | I |
H,K |
J |
L |
Yai's, ZooTicket, Yoka1, Hades, HospBed, HospComp, Under2,7 | |
| Canodumb3 | 130 | 100 | Q |
O,P |
R |
S |
ACDCTank, WWW1-3 | |
| CanodumbΩ | 180 | 200 | n/a |
UnderRanking-Prelim, MetalSP | ||||
| Moves: | None. | |||||||
| Attack: | If MM is in the same row, it sends a crosshairs forward. If the crosshairs target something, the Cannon fires, instantly hitting the first thing in its path. | |||||||
| Bio: | Besides Mets, these are the most basic and widely encountered enemies in the game. They are usually extremely easy to deal with, just stay out of their row. The difficulty goes up when there is something else in the battle restricting your movement between rows. | |||||||
| Virus | Name | HP | Atk | Chips/BustingLvl |
Locations | |||
1-7 |
7-10 |
10-S |
Cust S |
|||||
 |
Bunny (Rabbiri) |
40 | 15 | Q,S |
M |
A |
P |
Yai's, Mayl's, ACDC3, Prncp'sPC, ACDC2, YaiPhone, LabVending |
| TuffBunny (HighRabbiri) |
100 | 60 | W |
N,B |
R |
G |
TVStationPanel, Under2,6,7 | |
| MegaBunny (MegaRbri) |
160 | 90 | Z,T |
O |
E |
C |
HospVending, WWW | |
| BunnyΩ | 220 | 150 | n/a |
UnderRanking-Prelim, FlashSP | ||||
| Moves: | Hops to random adjacent panels. | |||||||
| Attack: | Speeds up and attempts to line up with MM before firing a quick ZapRing down the row, paralyzing the first thing it hits. | |||||||
| Bio: | One of the most annoying enemies early in the game. Its quick and unpredictable movements make it difficult to target except when it's attacking. Usually just a nuisance and relatively fragile, it becomes much deadlier when it has friends to hit you while you're paralyzed, or ice to make it stronger. | |||||||
| Virus | Name | HP | Atk | Chips/BustingLvl |
Locations | |||
1-7 |
7-10 |
10-S |
Cust S |
|||||
 |
Eleball (Paraball) |
80 | 20 x2 |
J |
T,D |
B,R |
Prncp'sPC2, ACDC2, HikariPanel | |
| Elesphere (Paralaika) |
150 | 50 x2.5 |
K |
M,Q |
G,A |
WWW1 | ||
| Eleglobe (Paracrosser) |
200 | 80 x3 |
N |
F,I |
P,S |
Secret1 | ||
| EleballΩ | 220 | 160 x3.75 |
n/a |
Ch6-Request16, FlashSP | ||||
| Moves: | Flyer. Hovers back and forth across the field in a diagonal criss-crossing pattern, reflecting off sides and corners. | |||||||
| Attack: | Stops when MM is in one of the surrounding panels and does a RingZap attack - two balls of electricity circle it clockwise starting from the panels above and below it. First version zaps for two cycles (hits each panel twice), second version 2.5 cycles, third version 3 cycles, and Omega version 3.75 cycles. | |||||||
| Bio: | This thing is only a problem if you let it stop and attack in your middle panel. Unfortunately that could happen often if you're not ready for it and just try to run away from it. Figure out its flight pattern first and get it to stop on the right side of your area where you can better counter-attack. | |||||||
| Virus | Name | HP | Atk | Extra Info | Chips/BustingLvl |
Locations | |||
1-7 |
7-10 |
10-S |
Cust S |
||||||
 |
Spikey (Garuu) |
90 | 30 | ShotGun | H |
I |
J |
B,P |
Dex's, ZooAlarm, ZooComp, DogHouse, HikariPanel, GiraffeComp, Hades, LionComp, LabDoor, ACDCTank |
| GaruuBur | 140 | 60 | V-Gun | J |
I,(V) |
F |
K |
ZooComp4, DogHouse, Hades, LionComp, EditingComp, Under1-3, LabDoor, ACDCTank | |
| GaruuDan | 190 | 90 | SideGun | J |
K |
L |
T,C |
DogHouse, Hades, Under1-3,7, ACDCTank, WWW3, Secret2-3 | |
| SpikeyΩ | 260 | 150 | ShotGun | n/a |
BreederBattle, UnderRanking-Prelim, BeastSP, FlameSP | ||||
| Moves: | Random teleport. | ||||||||
| Attack: | Lines up with MM and spits a quick fireball down the row that explodes on contact with the first thing in its path, also burning adjacent panels in a particular pattern. First and Omega versions burst hits the panel behind the target, second version hits both panels diagonally adjacent behind the target, and third version hits both panels vertically adjacent to the target. | ||||||||
| Bio: | If there are objects on the field, make sure you know the explosive pattern of the fireballs or you could be caught off-guard by the splash damage. They don't give much warning before they attack, so you have to watch carefully for when they stop moving. | ||||||||
| Virus | Name | HP | Atk | Extra Info | Chips/BustingLvl |
Locations | |||
1-7 |
7-10 |
10-S |
Cust S |
||||||
 |
Shrimpy (Ebiron) |
100 | 30 | ShotGun | E |
D |
C |
A,P |
YaiPhone, LabVending, NumberStandee, Yoka, Hades |
| Ebidel | 130 | 60 | V-Gun | E |
D |
F |
S,V |
Beach1, EditingComp, Hades, Under1-2 | |
| Ebiside | 160 | 90 | SideGun | F |
E |
G |
R,B |
Hades, Under1-2,7, Secret3 | |
| ShrimpyΩ | 200 | 150 | ShotGun | n/a |
UnderRanking-Prelim, BubbleSP | ||||
| Moves: | Floater. Slides vertically back and forth across the column. | ||||||||
| Attack: | Occasionally spits out a ground-based bouncing bubble down the row that explodes on contact with the first thing in its path, also hitting adjacent panels in a particular pattern. Same patterns in same order as Spikey above. | ||||||||
| Bio: | It's one of the few viruses that don't actually aim for you, but that doesn't make it any less annoying. The randomness of its attack makes it unpredictable and like Spikey it can use objects on the field to catch you at odd angles. Though it has a significant weakness in that it can only spit out a bubble once after moving to a panel, so if you pin it down by placing an object in the middle of its column then it's just a helpless shrimp. | ||||||||
| Virus | Name | HP | Atk | Extra Info | Chips/BustingLvl |
Locations | |||
1-7 |
7-10 |
10-S |
Cust S |
||||||
 |
Boomer (Rounda) |
70 | 30 | M,T |
J,H |
*,[F] |
SchoolServer, ACDC2, SciLab, Tamako's, ZooTicket, ZooComp | ||
| Gloomer (Raundarau) |
140 | 60 | 1 PanlGrab | V,N |
E,K |
*[I] |
Under4-5,7, WWW4 | ||
| Doomer (Roundabar) |
180 | 90 | 2 PanlGrab | O,U |
P |
L[Z] |
Secret1-2 | ||
| BoomerΩ | 320 | 150 | 2 PanlGrab | n/a |
PlantSP, BowlSP, YamatoSP | ||||
| Moves: | Flyer. Slowly slides back and forth within its column. Shielded when not attacking. | ||||||||
| Attack: | When it reaches the top or bottom end of the column, it will launch a fast Boomerang straight down the row, which turns across the leftmost column and then back the opposite row from which it started. Boomer will never attack from the middle row, but higher versions may use PanelGrab after their first attack to reduce your safe area. | ||||||||
| Bio: | At first you can easily avoid the speedy Boomerang by sticking to the middle panels, clear of the edges, but PanelGrabs and other enemies insist on making it less easy than it looks. Its shielding makes it difficult to delete quickly as well. Take advantage of its momentary vulnerability after attacking, the Boomerang doesn't immediately return to guard its face right after it disappears off the edge of the screen. You'll have to be quick either way though. | ||||||||
| Virus | Name | HP | Atk | Extra Info | Chips/BustingLvl |
Locations | |||
1-7 |
7-10 |
10-S |
Cust S |
||||||
 |
Ratty (Chuuton) |
40 | 20 | Ratton 4HP |
J,F |
H |
C |
A |
YaiPhone, SciLab2, InnTV, ZooTicket, ZooComp, NumberStandee, HikariPanel, GiraffeComp, Beach1 |
| Ratty2 | 100 | 50 | Ratton 10HP |
O |
N,F |
C |
A |
HikariPanel, VanRelay, Under4-5,7 | |
| Ratty3 | 160 | 80 | Ratton 40HP |
R |
S |
C,F |
A |
Secret1 | |
| RattyΩ | 230 | 150 | Ratton 80HP |
n/a |
UnderRanking-Prelim, BeastSP | ||||
| Moves: | Slides to random adjacent panels. Speeds up as health decreases. | ||||||||
| Attack: | Occasionally releases a ground-based Ratton that travels down the row and when it reaches MM's column, it turns up or down to hook into him. The Ratton explodes on the first thing it hits. | ||||||||
| Bio: | With their quick and unpredictable movements, these can be among your most dangerous enemies. Any time you fight these guys you'll want to be able to take each one out with one hit. Rapid fire with the buster is one big no-no. You can use holes to protect yourself at least temporarily. The Omega version's attack has the color and screen-shaking effect of the HyperRat Program Advance, but that's just its appearance, not that the damage isn't anything to be afraid of anyway. | ||||||||
| Virus | Name | HP | Atk | Chips/BustingLvl |
Locations | |||
1-7 |
7-10 |
10-S |
Cust S |
|||||
 |
Fishy (Kiorushin) |
90 | 30 x2 |
D,Z |
J,C |
G |
* |
LabDoor, LabComp, SciLab, Beach, Yoka1 |
| Birdraft | 150 | 60 | F,Q |
W,S |
B |
Burning S,A [F,R] |
Hades, Yoka1 | |
| HellCondor | 240 | 90 x3 |
L,Z,I,S |
B |
DemonComp, Under1-4,7, WWW4, InnArmor, Secret3 | |||
| FishyΩ | 300 | 150 x5 |
n/a |
UnderRank-8, GutsSP, BluesSP | ||||
| Moves: | Flyer. Slides vertically back and forth across the column. | |||||||
| Attack: | When it lines up with MM, it dashes down the row. Birdraft leaves a line of flames in its wake. After disappearing off the left side of the screen, it may reappear from the right and dash across MM's new row before returning to the panel from which it launched. The first version Dashes twice per attack, Birdraft just once, HellCondor thrice, and the Omega version five times. | |||||||
| Bio: | Very fast attackers. Their initial launch is usually easy to avoid but their return trips are more sudden, you really have to be aware of their pattern and timing to be able to dodge properly. Birdraft is a whole different problem - if you're careless enough to let it Dash down the middle row, then even if you dodge you're going to take a hit afterwards as you're pinned to the side row, the enemy is lining up with you again, and the only way out is through the flames that just won't die out fast enough. To make things easier, drop a StoneCube in their way. They can also be stopped by rocks or other enemies. Don't count on just any object though, they run right through Rooks. If you have Custom Style, be sure to get the BurningCross chip from Birdraft. | |||||||
| Virus | Name | HP | Atk | Extra Info | Chips/BustingLvl |
Locations | |||
1-7 |
7-10 |
10-S |
Cust S |
||||||
 |
Swordy (Swordin) |
90 | 30 | 2 Steals | Y,I |
L |
E |
R |
SciLab, ZooComp2-4, NetBatlComp |
| Swordra | 140 | 60 | 2 Steals | N,(U) |
P |
F |
Beach1, NetBattleMachine, HospComp3-5, Under3 | ||
| Sworter | 220 | 100 | 2 Steals | N,(T) |
A(H) |
P |
Yoka1, DemonComp, Under2, Secret1,3 | ||
| SwordyΩ | 320 | 200 | 2 Steals | n/a |
BreederBattle, UnderRanking-Prelim, KingSP, BluesSP, YamatoSP | ||||
| Moves: | Floater. Slides to adjacent panels. First moves up or down to line up with MM then moves forward. | ||||||||
| Attack: | Uses WideSword if MM is in the next column, LongSword otherwise. Each one has two AreaGrabs that may be used after a few attacks to help them get closer. | ||||||||
| Bio: | They start out harmless enough, but you have to delete them quickly or they can pin you down. Keep them at a distance with your own AreaGrabs or put down objects to slow them down. | ||||||||
| Virus | Name | HP | Atk | Extra Info | Chips/BustingLvl |
Locations | |||
1-7 |
7-10 |
10-S |
Cust S |
||||||
 |
Quaker | 80 | 15 | J,O |
D,H |
*[P] |
SciLab, InnTV | ||
| Shaker (Quakedom) |
140 | 40 | G,V |
S,M |
*[P] |
Beach1, VanRelay, Under5,7 | |||
| Breaker (Quakedaba) |
240 | 80 | Z,I,(T,L) |
C |
VanRelay, Secret3 | ||||
| QuakerΩ | 360 | 150 | Cracks | n/a |
Ch6-Request16, DesertSP | ||||
| Moves: | Jumps high into the air and attempts to land on a random panel in MM's row. | ||||||||
| Attack: | When it lands, it releases a Shockwave identical to a Met's and the quake effect momentarily prevents MM from moving on panels. Omega version cracks the panels the Shockwave passes over. If the virus lands on a sand panel, the impact is cushioned and no Shockwave or quake effect occur. | ||||||||
| Bio: | If you pay attention, dodging should be no problem. You get plenty of warning prior to attack while the virus is up in the air. Get into a different row before it lands because the quake effect makes it impossible to get out of the way in time otherwise. There are a lot of other ways to protect yourself though; use holes to stop the Shockwaves, set SandStage to cushion their landings, use Invis, Barriers, or AirShoes on your own holes to avoid the quake effect. The tricky thing with these guys is they spend so much time jumping that it can be hard to get them while they're vulnerable. When they do come down within firing range you need to make sure the quake effect doesn't ruin the timing of your counter-attack. | ||||||||
| Virus | Name | HP | Atk | Extra Info | Chips/BustingLvl |
Locations | |||
1-7 |
7-10 |
10-S |
Cust S |
||||||
 |
Pengi (Koripen) |
80 | 30 | IceWave 1HP Shielded |
Q |
M,W |
*, [A,K] |
LabVending, Yoka1, HospComp5 | |
| Penga (Koripen-tan) |
100 | 60 | IceWave |
R,P |
L,D |
*,[H] |
LabVending, HospVending | ||
| Pengon (Kripn-taro) |
130 | 90 | IceStage, IceWave 1HP Shielded |
V,J |
C,D |
R |
HospComp5 | ||
| PengiΩ | 260 | 150 | IceStage, IceWave 1HP Shielded |
n/a |
Ch9-Request25A, BubbleSP | ||||
| Moves: | Slides in a random direction horizontally or vertically until it gets stopped by an obstacle or edge, then picks another direction. Shielded when on an ice panel. | ||||||||
| Attack: | Occasionally shoots an IceWave between moves. A shielded snowflake will slowly move forward while oscillating between the row it was fired from and the adjacent row, so it eventually covers every panel in those two rows. Third and Omega versions may use IceStage early on. | ||||||||
| Bio: | If for some reason you're stuck in the two rows the IceWave is covering you can avoid it by getting close and when it turns up/down into the next row, quickly move forward into the panel it left before it weaves back into you. Otherwise, the easy way to dodge is to just get into the row it's NOT covering. Like Mushy and Volcano, these guys draw an advantage from their affinitive panel type, so keep them at a disadvantage with your own terrain-manipulating effects. Of course if you keep the ice but use one of the Elec attacks that also has breaking effect (Sensor, Flashman) then you're doing quadruple damage, so it's up to you how you want to approach it, as long as you have something on hand to hurt them if the higher versions pull an IceStage because otherwise they're invincible. | ||||||||
| Virus | Name | HP | Atk | Extra Info | Chips/BustingLvl |
Locations | |||
1-7 |
7-10 |
10-S |
Cust S |
||||||
 |
WindBox | 100 | 0 | Blows | Wind * |
Tamako's, Yoka1, DemonComp, HospTV | |||
| VaccuumFan | 100 | 0 | Sucks | Fan * |
DemonComp, Secret1 | ||||
| StormBox | 300 | 0 | Blows | n/a |
Ch6-WWWDecoys, Monolith2a | ||||
| WindΩ | 500 | 0 | Sucks | n/a |
Monolith1, MetalSP, MistSP | ||||
| Moves: | None | ||||||||
| Attack: | Not really an attack. It will just constantly either blow you towards the left (WindBox and StormBox) or suck you towards the right (VaccuumFan and Omega Version). | ||||||||
| Bio: | They seem harmless enough, but teamed up with other viruses they can be a real nuisance, impairing both your aiming and your dodging. Use a Barrier or Aura to negate the windy effects. | ||||||||
| Virus | Name | HP | Atk | Extra Info | Chips/BustingLvl |
Locations | |||
1-7 |
7-10 |
10-S |
Cust S |
||||||
 |
HardHead (HardBallz) |
80 | 60 | Breaks | D,P |
L,A |
Tamako's, HospComp, WWW1, InnArmor | ||
| ColdHead (ColdBallz) |
120 | 100 | Ice | M |
* |
Hades, Secret1 | |||
| HotHead (MagraBallz) |
200 | 150 | Lava | H,N |
*, [B,C] |
LabDoor | |||
| HardHeadΩ | 300 | 200 | Breaks | n/a |
Ch8-Request22, GutsSP, KingSP, BowlSP | ||||
| Moves: | None. Shielded while mouth is closed. | ||||||||
| Attack: | After several seconds of motionlessness, it will shake, open its mouth, turn red, and launch a CannonBall directly onto the panel MM is standing before closing up again. The ball will break the panel it lands on for first and Omega versions. ColdHead's ball turns the panel to ice, and HotHead's ball turns the panel to lava. | ||||||||
| Bio: | Since they spend most of the time shielded, it can be hard to delete them quickly. If there's more than one they stagger their attacks too so they can end up fast transforming your field. Take breaking attacks or hit them with perfect timing to take them out effectively. | ||||||||
| Virus | Name | HP | Atk | Chips/BustingLvl |
Locations | |||
1-7 |
7-10 |
10-S |
Cust S |
|||||
 |
Beetle (BomBeetle) |
90 | 20 | T,H |
J,F,D |
* |
ZooComp3-4, Beach2 | |
| Deetle (DomBeetle) |
130 | 50 x2 |
Q,K |
H,C |
*,[A] |
Beach, Hades, TVStationPanel, Under3 | ||
| Geetle (GomBeetle) |
170 | 80 x3 |
W,P |
N,I |
E |
Secret1-2 | ||
| BeetleΩ | 220 | 140 x3 |
n/a |
UnderRanking-Prelim, BeastSP | ||||
| Moves: | Walks to adjacent panels. Attempts to stay three columns away from MM and in a different row. | |||||||
| Attack: | When it stops moving it launches LilBombs directly onto the panel where MM is standing. First version launches one bomb at a time, second version launches two in succession, third and Omega versions launch three in succession. | |||||||
| Bio: | Their movement in response to your own can either be a frustration or used to your advantage. Make the ones in Hades Area walk right into the lava or get them into position for your attack, as long as you wait for them to stop and fire before you make your move. | |||||||
| Virus | Name | HP | Atk | Extra Info | Chips/BustingLvl |
Locations | |||
1-7 |
7-10 |
10-S |
Cust S |
||||||
 |
Trumpy (Lalapappa) |
90 | 0 | Invince | Y |
L,G |
*, [C,E] |
NumberStandee, Beach, EditingComp | |
| Tuby (Lalatuba) |
150 | 0 | Confu | Z,N |
T,D |
*[F] |
Under6-7 | ||
| Tromby (Lalabone) |
200 | 0 | Quake | W,U |
N,Q |
*[A] |
WWWall, Secret3 | ||
| TrumpyΩ | 300 | 0 | Invince | n/a |
UnderRanking-Trap, Ch9-Request23, KingSP | ||||
| Moves: | Randomly hops either up or down within its column. | ||||||||
| Attack: | After a few hops it plays its sound for a few seconds, affecting the entire field. First and Omega versions make other viruses invincible, Tuby makes MM confused, and Tromby shakes the ground making MM immobile unless using AirShoes to walk over holes. | ||||||||
| Bio: | This is a support-type virus, not dangerous by itself but quite annoying for the way it helps other viruses. It's generally helpful to take them out first, but they tend to hide in the back. The Discord and Timpani effects of the higher versions can affect you through Invis and will automatically cancel Mole. You can avoid the effects with Shadow, but as with Wind/Fan, Barriers or Auras work best because they can stick around the longest. | ||||||||
| Virus | Name | HP | Atk | Chips/BustingLvl |
Locations | |||
1-7 |
7-10 |
10-S |
Cust S |
|||||
 |
Slimer (Jelime) |
90 | 30 | C |
B,D |
Y,K |
Yoka | |
| Slimey (Nuraime) |
150 | 60 | F |
E,G |
S,[P] |
HospVending, HospComp5, Under1,7, WWWall, WWW2, Alpha | ||
| Slimest (Nebaraime) |
220 | 90 | S,T |
U |
Under7 | |||
| SlimerΩ | 300 | 150 | n/a |
Ch9-Request25A, BubbleSP | ||||
| Moves: | Hops panel-by-panel towards MM. If it hops into a panel on your side of the field, that panel is automatically stolen for the enemy's side. | |||||||
| Attack: | If it tries to hop into an occupied panel, the thing in that panel is hit and the virus bounces back into the panel it hopped from. | |||||||
| Bio: | It takes a while for them to hop close enough to actually attack you, so they're not much of a threat by themselves. They're more of a support-type virus, aiding other enemies by gradually reducing your area. You can't just fight back against the stealing with your own Steal-type chips because the Slimers will always be occupying the column you're trying to steal back. Try using Wind and other effects to push them back, or just delete them as fast as possible since unlike other support-types they don't hide in the back. | |||||||
| Virus | Name | HP | Atk | Extra Info | Chips/BustingLvl |
Locations | |||
1-7 |
7-10 |
10-S |
Cust S |
||||||
 |
Yort (Yo-Yacht) |
120 | 20 x3 |
Yo-Yo 1HP Shielded |
E,F |
G |
C,D |
Beach, Hades | |
| Yurt (Yo-Ship) |
160 | 40 x3 |
Yo-Yo 1HP Shielded |
H,I |
I,J,K |
L,H |
Under3, Hades | ||
| Yart (Yo-Land) |
210 | 60 x3 |
Yo-Yo 1HP Shielded |
O |
M,N |
P,Q |
Secret1 | ||
| YortΩ | 420 | 80 x3 |
Yo-Yo 1HP Shielded |
n/a |
UnderRanking-Prelim, MetalSP | ||||
| Moves: | Flyer. Slides up and down within its column, attempting to match MM's row. | ||||||||
| Attack: | When it lines up with MM, it launches a shielded Yo-Yo three panels ahead where it spins in-place for a moment before returning to the virus, which is immobile during the attack. The third panel receives three quick stunning hits. The other two panels receive one hit coming and a second hit as the Yo-Yo returns. If the Yo-Yo is destroyed the virus rapidly slides back and forth in its column for a few seconds in attempt to avoid attacks while its weapon regenerates. | ||||||||
| Bio: | These guys are quick and dangerous, you'll want to keep your distance. You can hide behind objects so the Yo-Yo breaks itself running into them, but that's only a temporary reprieve. Try using Wind to keep them back where their attack can't reach you. The Yo-Yo isn't just a problem because of the multiple hits, but since you don't get any temporary invulnerability you're set up to take even more damage from the other viruses on screen while you're stunned. | ||||||||
| Virus | Name | HP | Atk | Chips/BustingLvl |
Locations | |||
1-7 |
7-10 |
10-S |
Cust S |
|||||
 |
SnowBlow (SuunHock) |
100 | 30 x3 |
H,O,A,F |
S |
Beach | ||
| LowBlow (ByuuHock) |
140 | 60 x3 |
W,H,M |
C,G |
DemonComp, Under6 | |||
| MoBlow (GohHock) |
180 | 90 x3 |
V,N |
A,[G] |
Secret2 | |||
| SnowBlowΩ | 300 | 120 x3 |
n/a |
UnderRank-10, DesertSP | ||||
| Moves: | None. | |||||||
| Attack: | Fan effect sucks MM towards the right for a few seconds, then three tornadoes are generated in succession, each one starts in the rightmost panel of SnowBlow's row in your area, moves up or down to match MM's row, then travels forward down that row. | |||||||
| Bio: | The Fan effect is often pointless as you have plenty of opportunity to move out of the way again once it stops and before the attack phase begins. Other factors can make it a bigger problem, like other enemies with close-range attacks or hazardous terrain in the inner columns, which you'll find is often the case for higher-level battles against this family. The higher speed with the upper versions will make getting between those tornadoes difficult, and you may take multiple hits. Try waiting in a far corner until just before the first tornado reaches you, then move to the opposite row. If your timing is right the tornadoes won't cover all three rows, giving you more room to dodge. Another way to make dodging easier is to use Steal-type chips so the attack starts farther to the right. | |||||||
| Virus | Name | HP | Atk | Chips/BustingLvl |
Locations | |||
1-7 |
7-10 |
10-S |
Cust S |
|||||
 |
Momogra(n) | 60 | 40 | H,O |
J,A |
*,[D] |
Hades, WWW1 | |
| Momogro(o) | 130 | 80 | K,I |
R,G |
*,[B] |
HospTV, Hades, Under7, WWW4 | ||
| Momogre(o) | 180 | 120 | Q,L |
M,E |
C |
Secret3 | ||
| MomograΩ | 250 | 200 | n/a |
BreederBattle, Ch9-Request25E, BeastSP, DesertSP, DrillSP | ||||
| Moves: | Random teleport. When it's not attacking it is immune to all damage except from ground-damaging effects. All other attacks pass right over it. | |||||||
| Attack: | After several movements, or after MM uses an attack chip that immobilizes him for a moment, the virus will appear above ground in the panel behind MM and whack him with a shovel before quickly returning to its side of the field. | |||||||
| Bio: | These guys are irritating. The easiest way to avoid their attack is to stay in the leftmost column so they have no way of appearing behind you. That doesn't make it any easier to delete them though. If you don't have an appropriate ground-based attack then you'll need to wait for them to attack, and counter-attacking behind you is a problem on its own. You'd have to be very fast or have one of the few attacks that can go behind you like BodyBurn, Slasher, Rope, or Boomerang. It's best to have attacks that can take them out on their side though. BigWave, Magnum, Meteors, MetaGel, LavaStage, Guardian, and Gutsman are all good methods since they can take out several Momogras at once. | |||||||
| Virus | Name | HP | Atk | Extra Info | Chips/BustingLvl |
Locations | |||
1-7 |
7-10 |
10-S |
Cust S |
||||||
 |
Totem (Totopole) |
100 | 50 | 3 Rcv150 | V |
O |
M |
G,[H] |
InnTV, DemonComp, HospBed, HospComp |
| Totam (Trinpole) |
160 | 100 | 3 Rcv200 | T |
E |
Z |
A,[C] |
HospComp3, Under6-7 | |
| Totun (Tongapole) |
250 | 150 | 3 Rcv300 | Q |
K,N |
D,[I] |
Secret1 | ||
| TotemΩ | 300 | 200 | 3 Rcv300 | n/a |
Ch9-Request25W, MistSP | ||||
| Moves: | None. Switches faces when hit with a flinching attack. | ||||||||
| Attack: | Default face breathes fire that slowly extends down the first three panels in the row in front of it, then slowly shrinks back. When switched to its calm face, it won't attack, but will use up to 3 Recovs to heal itself and other viruses when their health gets low. | ||||||||
| Bio: | With their limited attack range and low speed they aren't hard to avoid, but the flamethrower lingers in your area long anough that it may make it hard to avoid attacks from other viruses. Their Recov mode is troublesome as it tends to undo all your hard work right before you finish them off, so try to avoid hitting them with flinching attacks unless it's going to delete them. | ||||||||
| Virus | Name | HP | Atk | Chips/BustingLvl |
Locations | |||
1-7 |
7-10 |
10-S |
Cust S |
|||||
 |
Heavy (Heavyarray) |
100 | 30 | E,U |
G |
S |
R |
HospTV, Under5 |
| Heavier (Heavyaraise) |
150 | 60 | Q,F |
I,B |
L |
WWWall | ||
| Heaviest (Heavyaraid) |
200 | 90 | D,T |
Z,R |
M |
Secret1 | ||
| HeavyΩ | 300 | 150 |
n/a |
Ch9-Request25F | ||||
| Moves: | Flyer. Slides back and forth in its column in a shaking pattern. | |||||||
| Attack: | After shaking four times in its own column, it teleports into MM's column to shake four times much faster. It then returns to where it started and repeats. | |||||||
| Bio: | By itself, a very easy virus to deal with. Its attack is easy to dodge (step back) and the amount of time it spends shaking in the same column makes it an easy target for your counter-attack. Teamed up with other viruses it may prove a bigger threat due to the way it restricts your movement left and right, making it harder to dodge the other attacks. Try to avoid it appearing in your middle column if this is the case. | |||||||
| Virus | Name | HP | Atk | Chips/BustingLvl |
Locations | |||
1-7 |
7-10 |
10-S |
Cust S |
|||||
 |
N.O | 120 | 50 | W,K |
C, [G,F] |
HospTV | ||
| N.O-2 | 160 | 80 | U,I |
S, [E,Y] |
Secret2 | |||
| N.O-3 | 200 | 120 | H,W |
Z, [V,M] |
Secret3 | |||
| N.O-Ω | 300 | 200 | n/a |
Ch9-Request25N, KingSP | ||||
| Moves: | Flyer. Slides quickly up and down within its column, attempting to match MM's row. Automatically regenerates HP very fast. | |||||||
| Attack: | When lined up with MM, it will fire a paralyzing NOBeam down the row. Virus is immobile while attacking. | |||||||
| Bio: | A rare and dangerous breed. The high speed at which it lines up and attacks means you have to keep moving when it's around. While it doesn't heal all its damage instantly, it still heals fast enough that there's little point in hitting it with any attack that doesn't delete it in one hit. Keep your distance and sidestep the Beam when its fired. Take advantage of the way the virus can't move for a moment after firing to get some breathing room. | |||||||
| Virus | Name | HP | Atk | Chips/BustingLvl |
Locations | |||
1-7 |
7-10 |
10-S |
Cust S |
|||||
 |
Mushy (ChaMush) |
50 | 50 | Z,I |
S |
D,B |
* |
HospBed, HospComp1-3 |
| Mashy (KiMush) |
100 | 80 | K |
I |
F,C |
R |
HospBed, GiraffeComp | |
| Moshy (KuroMush) |
160 | 120 | Q,O |
J |
F |
D |
ZooComp3 | |
| MushyΩ | 200 | 200 | n/a |
BreederBattle, Ch9-Request25W | ||||
| Moves: | Floater. Quickly randomly teleports between grass panels. If no grass is present, it will shiver in place. | |||||||
| Attack: | Occasionally pops into a grass panel surrounding MM on your side of the field and releases BadSpice on each panel surrounding it in a clockwise pattern. MM will become confused if hit by the Spice. | |||||||
| Bio: | They can be quick and hard to avoid, but they are critically dependent on the terrain. Use fire, Geddon, Gutsman, or any other ground-manipulating chip besides GrassStage to render them immobile and helpless. | |||||||
| Virus | Name | HP | Atk | Chips/BustingLvl |
Locations | |||
1-7 |
7-10 |
10-S |
Cust S |
|||||
 |
Needler (NdlCaster) |
90 | 30 | M,I |
S,R |
HospBed, HospComp | ||
| Nailer (NdlCarrier) |
140 | 60 | V,T |
F,H |
ACDCTank, WWW1-3 | |||
| Spiker (NdlRoller) |
200 | 100 | U,Z |
L, [O,D] |
Secret3 | |||
| NeedlerΩ | 400 | 200 | n/a |
Ch9-Request25W, DrillSP | ||||
| Moves: | None. | |||||||
| Attack: | Constantly fires Needle shots simultaneously up, left, and downwards. After a while, it will begin to shake and then launch itself down the row and back, attempting to hit MM with a well-timed shot as soon as it is lined up with him either vertically or horizontally. | |||||||
| Bio: | These guys are easy to handle. Take note of their firing frequency so if you have to enter their row you can get in-between their shots. They're only slightly more challenging to dodge when they charge and they take so long to try that you'll probably finish the battle long before they get a chance. | |||||||
| Virus | Name | HP | Atk | Chips/BustingLvl |
Locations | |||
1-7 |
7-10 |
10-S |
Cust S |
|||||
 |
Viney (Azomerta) |
120 | 60 +30 |
O,G |
J |
*, [M,D] |
HospComp2-5, ZooComp3 | |
| Viner (Azomertle) |
160 | 100 +30x2 |
O,U |
T,G |
E |
Under6, WWW1 | ||
| Vinert (Azomadiga) |
200 | 120 +30x3 |
V,U |
T |
I,H |
WWW1 | ||
| VineyΩ | 300 | 200 +30x3.5 |
n/a |
Ch6-Request16, PlantSP | ||||
| Moves: | None. Is immune to all damage except from fire-elemental attacks, or attacks directed at its vines. | |||||||
| Attack: | It makes a vine appear from the ground in your area. The vine will move panel-by-panel chasing MM in attempt to catch and hold him. After the initial wood-elemental damage from being caught by the vine, MM may receive additional hits of 30 non-elemental damage every second while still enveloped. Rapid button-mashing can free MM from the vine faster. The vine may be destroyed with a breaking or fire-elemental attack, but the virus will send out a new one in short order. | |||||||
| Bio: | Here's where your folder can determine if the battle is very easy or nearly impossible. This virus is a sitting duck for a strong fire attack and if it's placed on grass as it often will be then all the better. Without fire, you're forced to attack the vine, which may be harder than it looks. Just because the vine is visible on a panel doesn't necessarily mean it's vulnerable. Your attacks pass right over it when it's just emerging or going back under. You'll have to carefully time your attacks for when it's at its peak, and while that's happening the next panel in its path is already sprouting so you don't have a great window to strike. Swords are an effective weapon for dealing with the vines invading your area but really, pack some heat so you don't need to worry about it. | |||||||
| Virus | Name | HP | Atk | Extra Info | Chips/BustingLvl |
Locations | |||
1-7 |
7-10 |
10-S |
Cust S |
||||||
 |
Puffball (Basiriko) |
120 | 50 |
2 Steals, Mask 1HP Shielded |
Q,V |
N,F,A |
* |
HospComp4-5 | |
| Poofball (Avoriko) |
220 | 80 1hp/6fr |
2 Steals, Mask 1HP Shielded |
Q,V |
N,W,A |
* |
HospComp3, Under7 | ||
| Goofball (Natariko) |
280 | 120 1hp/4fr |
2 Steals, Mask 1HP Shielded |
n/a |
HospComp2-MidBoss, Ch9-Request23, Monolith3b | ||||
| PuffballΩ | 400 | 200 1hp/2fr |
2 Steals, Mask 1HP Shielded |
n/a |
Ch6-Request16, PlantSP, MistSP | ||||
| Moves: | Teleports to a random panel leftwards, will not willingly step on lava. | ||||||||
| Attack: | When it gets as far left as it can, it shoots its shielded mask onto the panel in front of it, damaging and pushing MM back if he's standing there. The mask will stay there for several seconds poisoning the surrounding panels while the unshielded virus waits behind it. The virus returns to where it started and repeats the cycle after the attack is finished or if the mask is destroyed. The mask will instantly regenerate on the virus' face if destroyed. Each Puffball can use up to 2 AreaGrabs to get closer after each cycle. | ||||||||
| Bio: | Direct attacks are useless here. When it's not shielded by wearing the mask, it's hiding behind the shielded mask in the next panel. Make sure you have breaking attacks, or Bombs, or FireSwords, or something of the like to bypass this thing's defenses. You'll want to take them out fast, but between the high HP and the shielding they don't make it easy. At least with the poison effect you don't have to worry about your Busting Level dropping while you're taking damage, so don't be afraid to get up close if you need to. | ||||||||
| Virus | Name | HP | Atk | Extra Info | Chips/BustingLvl |
Locations | |||
1-7 |
7-10 |
10-S |
Cust S |
||||||
 |
Metrid (MeteMagi) |
150 | 40 x4, 5,7 |
Z,I |
V |
E |
S |
Under1-3 | |
| Metrod (MeteLord) |
200 | 80 x5, 8,6 |
1 Steal |
N,Q |
J |
H |
C |
WWW3 | |
| Metrodo (MeteFlare) |
250 | 120 x10, 16,18 |
2 Steals | Y,D |
F,S |
A |
Secret1-2 | ||
| MetrodΩ | 300 | 200 x8,5, 24 |
3 Steals | n/a |
UnderRanking-Prelim, FlameSP | ||||
| Moves: | Fast random teleport. | ||||||||
| Attack: | After moving around for a while, the virus will stop (behind an object, if any are present), drop down with its wand still standing, and summon several Meteors in succession aimed directly on or nearby MM's panel. The virus will cycle between three different meteor amounts each time it attacks. It may also use AreaGrab to reduce your ability to dodge, but apparently only when objects it can hide behind are present. | ||||||||
| Bio: | You may want to avoid summoning your own objects to the field with these guys around because they'll just try to take advantage of it. Encounters with them will usually have StoneCubes or IceCubes anyway, so try to turn it against them with AirShots or Punches. The meteors give you enough warning in the form of flashing yellow panels before they land, but they're guaranteed to keep you moving. | ||||||||
| Virus | Name | HP | Atk | Chips/BustingLvl |
Locations | |||
1-7 |
7-10 |
10-S |
Cust S |
|||||
 |
Killer(s)Eye | 140 | 50 | K,O |
P,C |
L |
Under1-2, SchoolServer, WWW1-2, Alpha | |
| Demon(s)Eye | 190 | 100 | N,H |
A,G |
S |
Under6 | ||
| Joker(s)Eye | 240 | 150 | O,J |
B, [P,E] |
Secret1 | |||
| KillerEyeΩ | 300 | 200 | n/a |
BreederBattle, Ch9-Request25E, DarkSP | ||||
| Moves: | Floater. No movement. | |||||||
| Attack: | Watches a horizontal or diagonal line in front of it for several seconds, the line indicated by flashing red dots on the panels. If MM or your object are in one of those panels, the eye will fire a very fast paralyzing laser down that line, piercing shielding and Invis. After firing a beam or after it otherwise finishes watching a line, it wil blink and switch to watching another line in a sweeping pattern. If it's in the middle row, it starts looking across its row, then looks diagonally upwards, then forwards again, then diagonally downwards, then forwards, and repeats. If placed in the top or bottom row, it only switches between looking forwards and diagonally away from the edge its on. | |||||||
| Bio: | Always be aware of its sensor pattern because it doesn't give you a lot of chance to dodge if you stumble into its view. If you move straight through its gaze you might be fast enough to avoid the attack, but it's safer to just stay out of its line of sight. That can be especially hard when it's placed in the middle, so in that case just delete it as fast as possible. You may also try Shadow or Mole, since they're the only defenses that can actually avoid the beam. | |||||||
| Virus | Name | HP | Atk | Chips/BustingLvl |
Locations | |||
1-7 |
7-10 |
10-S |
Cust S |
|||||
 |
Jelly | 170 | 50 | T,L |
S,E |
Under2, WWWall, WWW2 | ||
| HeatJelly (JellyHeat) |
220 | 100 | U,F |
B,R |
Under7, WWW3 | |||
| EarthJelly (JellyEarth) |
270 | 150 | Z,V |
G,D |
Secret2 | |||
| JellyΩ | 370 | 200 | n/a |
BreederBattle, Ch9-Request25A, BubbleSP | ||||
| Moves: | Floater. No movement, but floats up and down in its panel so that it evades damage while up high. | |||||||
| Attack: | After several seconds of charging up, releases a ground-based elemental wave down all three rows. The wave in each row stops on the first thing it hits. | |||||||
| Bio: | An unavoidable attack by default, but holes, objects, or even other viruses will be your saving grace. Just make sure to time your a attacks for when it's near the ground. | |||||||
| Virus | Name | HP | Atk | Extra Info | Chips/BustingLvl |
Locations | |||
1-7 |
7-10 |
10-S |
Cust S |
||||||
 |
Volcano | 130 | 40 | Vertical | T,V |
S |
A |
[G] Volcano Y,Z |
Under3, Secret2-3 |
| Volcaner (Volcanodon) |
180 | 80 | Horizontal | O,B |
F |
M |
[D]
Volcano G,J |
Secret2-3 | |
| Volcanest (Vlcnogiren) |
230 | 120 x2 |
Vertical | H |
R,J |
W |
[E]
Volcano A |
Secret3 | |
| VolcanoΩ | 330 | 200 x2 |
Horizontal | n/a |
Ch9-Request25F, FlameSP | ||||
| Moves: | Slides back and forth within its column (Volcano/Volcanest), or within its row (Volcaner/VolcanoOmega). If it touches a lava panel it recovers all its HP. | ||||||||
| Attack: | Launches a firebomb directly onto the panel MM is standing. A flame remains burning on that panel for several seconds. Volcanest and VolcanoOmega launch two firebombs simultaneously, the second one aimed for a random panel. The bomb itself does not grant MM temporary invulnerability after it hits. | ||||||||
| Bio: | Without lava to heal it, it doesn't have a whole lot going for it. Use aqua or ground-manipulation to take away its lifeforce and then finish it off. It can be hard to guess which way they're going to move unless you remember their assigned patterns per version. | ||||||||
| Virus | Name | HP | Atk | Extra Info | Chips/BustingLvl |
Locations | |||
1-7 |
7-10 |
10-S |
Cust S |
||||||
 |
BrushMan (Fudello) |
120 | 50 | Sand, Swamp |
U,E |
R |
*, [L,J] |
Under4-5 | |
| BrushMan2 | 170 | 100 | Ice, Lava | n/a |
Monolith1 | ||||
| BrushMan3 | 220 | 150 | Lava, Swamp |
n/a |
Monolith2a | ||||
| BrushManΩ | 300 | 200 | Swamp | n/a |
Monolith2a, YamatoSP | ||||
| Moves: | Floater. Infrequent random teleport. | ||||||||
| Attack: | If it moves onto a non-holy panel in its area, it will turn the panel holy. It will alternate between setting holy panels in its own area and popping into your area to change a normal, cracked, grass, metal, or holy panel into sand, ice, lava, or swamp. If all panels in its area are holy and all panels on your side are sand, ice, lava, or swamp, it will just teleport around its area without doing anything. | ||||||||
| Bio: | For such small and harmless-looking viruses, these can be very annoying. It's best to strike hard and fast before this guy can lay down any holy panels. You can minimize the problems on your side by equipping FloatShoes, but that won't help against swamp. As a support-type virus it's not supposed to be directly dangerous but since it goes into your area so suddenly, there is a big risk of collision damage. | ||||||||
| Virus | Name | HP | Atk | Extra Info | Chips/BustingLvl |
Locations | |||
1-7 |
7-10 |
10-S |
Cust S |
||||||
 |
Dominerd (Curz) |
100 | 50 | Invisible | P,H |
C,L |
L,C |
* |
Under4-5 |
| Curzna | 170 | 100 | T,B |
L,C |
C,S |
WWWall, Undernet6 | |||
| Curzed | 220 | 150 | Geddon1 | L,C |
R,E |
Secret3 | |||
| DominerdΩ | 300 | 200 | Invisible, Geddon1 | n/a |
UnderRanking-Prelim, Ch9-Request25N, DarkSP | ||||
| Moves: | Flyer. First and Omega versions turn invisible and try to stay in the panel in front of one of the other viruses as their unseen shield, or teleport to random panels when other viruses are not present. Other versions will remain visible and slowly slide up and down within their column. All versions are shielded when not attacking. | ||||||||
| Attack: | When hit, or when there are no other viruses around and Dominerd is lined up with MM, it will teleport to MM's panel and after a split-second warning, bite down and then return to its side of the field. Third and Omega versions may use Geddon1 after a couple attacks. | ||||||||
| Bio: | As with HardHeads, it's best to keep some breaking attacks on hand to deal with these guys quickly. AirShoes may be another wise investment as higher level Dominerds in pairs will not hesitate to use Geddon at the same time as their partner, instantly stranding you to a panel where you can't dodge or counter-attack. Since they appear right in front of MM to attack, it's a common mistake to believe they can be hit from that spot by forward-directed attacks like guns and swords, but it's important to remember they're actually on the same panel as MM so to hit them with almost anything you have to take a step back first. For that invisible versions, you can still hit it even though you can't see it, and you can usually tell which enemy it's guarding by the empty panel in front of it and possibly its inability to move forward, as if something is blocking it. If finding the Dominerd is still an issue, pack Sensors or Flashman to zap it out of hiding. Strangely, even though Dominerds normally have both FloatShoes and AirShoes effects, they may still break a cracked panel on your side when attacking. That doesn't mean they momentarily lose their FloatShoes since they're still unaffected by lava in that instance. That's what makes it strange. | ||||||||
| Virus | Name | HP | Atk | Chips/BustingLvl |
Locations | |||
1-7 |
7-10 |
10-S |
Cust S |
|||||
 |
Elebee (SparkBee) |
90 | 30 | Q |
T |
M,E |
B |
WWW1-2 |
| Elewasp (SparkEagle) |
130 | 60 | Z |
U |
R,S |
F |
Secret2 | |
| Elehornet (SparkRay) |
170 | 90 | A |
N |
J,H |
P |
SchoolServer | |
| EleBeeΩ | 230 | 150 | n/a |
Ch9-Request25E, FlashSP | ||||
| Moves: | Flyer. Random teleport. Turns invisible between movements, only briefly appearing in each panel it moves to. | |||||||
| Attack: | Occasionally appears in MM's area either horizontally or diagonally in line with him, then shoots itself down that line in attempt to collide with MM before returning to the last panel it occupied in its own area. | |||||||
| Bio: | With their high speed and brief moments of visibility/vulnerability, it's best to employ time-stopping attacks to deal with them or Invis-piercing attacks like Sensor or Flashman. If you're going to wait for them to be visible their group will at least be synchronized until one of them attacks, then they'll start flashing into existence more staggered and that will make taking them out simultaneously much harder. | |||||||
| Virus | Name | HP | Atk | Extra Info | Chips/BustingLvl |
Locations | |||
1-7 |
7-10 |
10-S |
Cust S |
||||||
 |
Basher (Dogohn) |
150 | 50 | Left | T,H |
A |
C |
WWW3-4 | |
| Smasher (Dogyura) |
200 | 100 | Up | Z,N |
G,O |
B |
Secret2 | ||
| Trasher (Dogabiin) |
250 | 150 | Right | I,W |
S,F |
D |
ACDCTank | ||
| BasherΩ | 300 | 200 | Left | n/a |
Ch9-Request25F, BowlSP, FlameSP | ||||
| Moves: | None. | ||||||||
| Attack: | Sweeps your side of the field with its targeting system, aiming for three panels in a line at a time for three lines before repeating the sweep. There is a brief moment between targeted lines when nothing is being targeted. The first and Omega versions start from the third column from the left and move the sensors leftward, the second version starts from the bottom row and moves the sensors upward, and the third version starts from the leftmost column and moves the sensors towards the right. If Megaman is in any of the panels targeted, then the virus' upper body pops up into the air (becoming momentarily immune to damage) and blasts all three panels targeted with its Magnum attack, breaking the empty panels. | ||||||||
| Bio: | Normally you would have to time your movements carefully so that during those brief moments between targeted lines you transfer from your line which is about to be scanned to the line that has just finished being scanned. If you do get caught in the crosshairs and manage to get out of the way before the Magnum hits, then the holes left behind may make dodging the next sweep more difficult. AirShoes or MetalStage may help in that case. There's a much easier way to avoid the Magnum though; the sensor range doesn't adjust when you use AreaGrab or MetaGel or the like to expand your area, so just steal one column and hide there and the blind fool will never find you. | ||||||||
| Virus | Name | HP | Atk | Chips/BustingLvl |
Locations | |||
1-7 |
7-10 |
10-S |
Cust S |
|||||
 |
Shadow (DarkShdw) |
130 | 50 x3 |
U,Q |
J |
*, [H,N] |
Secret2, Undernet6 | |
| RedDevil | 170 | 100 x6 |
n/a |
Monolith2b | ||||
| BlueDemon | 210 | 150 x9 |
n/a |
Monolith3a | ||||
| ShadowΩ | 250 | 200 x12 |
n/a |
Monolith3b, DarkSP | ||||
| Moves: | Random teleport. Is immune to all damage except from swords and lava. All other attacks pass right through it. | |||||||
| Attack: | Teleports into MM's area as either a sword that stabs towards him from above or below, or an axe that chops towards him from the left or right. It does a number of consecutive attacks like this before returning to its area. | |||||||
| Bio: | One of the rarest enemies in the game. Their limited vulnerability is balanced by low HP (low by the point in the game where you start to encounter them). If you don't go in armed with sword-type chips, you're screwed. Fortunately they don't make things any harder by staying out of reach of most swords. They'll actually come right to you to get cut up. Strangely, even though they appear to be floating, they're actually ground-ridden and can even be harmed by lava panels. Also strangely, because they take the form of blades to attack, using your own Shadow chips will not protect you from them. | |||||||
| Virus | Name | HP | Atk | Extra Info | Chips/BustingLvl |
Locations | |||
1-7 |
7-10 |
10-S |
Cust S |
||||||
 |
Twins | 100 | 40 | Shot 5HP |
1T,2L 1A,2P |
1E,2S 1C,2D |
1*,2* |
EditingComp | |
| Twinner (Twinser) |
150 | 70 | Shot 10HP |
n/a |
Ch4-Request7 | ||||
| Twinnest (Twinsest) |
200 | 100 | Shot 20HP |
n/a |
Ch8-Request20 | ||||
| TwinsΩ | 300 | 200 | Shot 50HP |
n/a |
Ch9-Request25N, BluesSP | ||||
| Moves: | Flyer. Always appear in pairs. Each Twin will take turns teleporting to the nearest panel adjacent to the other, so they alternate between being beside each other in a column and being beside each other in a row. If one is deleted but the other is intact, then the one that was deleted will be instantly revived with full HP. | ||||||||
| Attack: | Strange objects will constantly appear in panels along the edge of your area and move in a horizontal or vertical direction from there. | ||||||||
| Bio: | It can be hard to predict which direction their shots are going to move or where they're going to appear, which makes finding a good opening to attack them even harder. Thanks to their instant revival defense, you need to take them both out at the same time. Try protecting yourself with Invis or something while you focus on them because dodging their shots can take up all your concentration otherwise. These guys are extremely rare and their chips aren't even very useful, they're mainly just obstacles to surpass in the few event battles in which they appear. | ||||||||
| Virus | Name | HP | Atk | Chips/BustingLvl |
Locations | |||
1-7 |
7-10 |
10-S |
Cust S |
|||||
 |
???? | 100 | 50 +36 |
n/a |
LionComp, DemonComp | |||
| ???? | 140 | 70 +130 |
n/a |
ACDCTank | ||||
| AlphaBug (ProtoBug) |
180 | 90 +181 |
n/a |
Alpha | ||||
| AlphaBugΩ | 300 | 150 +182 |
n/a |
Monolith3b, SerenadeSP | ||||
| Moves: | Random teleport. Automatically regenerates HP quickly. | |||||||
| Attack: | Occasionally launches its upper body directly onto the panel MM is standing. If MM is hit, he becomes paralyzed and if the creature is still latched on after the initial damage, more HP will drop every frame by poison effect until it returns to its side of the field. Button-mashing can free MM faster. If MM is not in the panel the creature aimed for when it lands, a strange green hole will linger on that panel for several seconds preventing you from moving there. | |||||||
| Bio: | These mysterious amoebas are linked to the final boss of the game and their unique attack represents the act of absorbing everything around them. Their attack can be very sudden and with the higher versions you stand to lose much more from the incidental poison effect than from the attack itself. At least you don't have to worry much about performance against these guys since they don't drop any chips anyway. Try to take each one out with one hit to get around their fast healing. | |||||||
| Virus | Name | HP | Atk | Extra Info | Chips/BustingLvl |
Locations | |||
1-7 |
7-10 |
10-S |
Cust S |
||||||
 |
Scutz (DrmMeraru) |
300 | 200 | Aura100 | LifeAura D |
Secret3 | |||
| Scuttzer (DrmMoss) |
300 | 200 +30x3 |
Aura100 | LifeAura D |
Secret3 | ||||
| Scuttle (DrmRapia) |
300 | 200 | Aura100, IceCube 60HP |
LifeAura D |
Secret3 | ||||
| Scuttler (DreamBolt) |
300 | 200x3 | Aura100 | LifeAura D |
Secret3 | ||||
| Scuttlest (DreamBit) |
200 | 200 | Aura200 | LifeAura D |
Secret3 | ||||
| ScuttleΩ (DrmBitSP) |
400 | 300 | Aura200 | n/a |
BreederBattle, Monolith3b, SerenadeSP, BassSP | ||||
| Moves: | Slides up and down within column. Scutz, Scutzer, and Scuttler will try to avoid MM's row while Scuttle, Scuttlest and Scuttlest Omega will try to match MM's row. Starts out each battle with an Aura and you must make a single hit dealing damage greater than or equal to the threshold to remove it. Elemental versions have regular 100 threshold Auras while Scuttlest and Scuttlest Omega have 200 threshold LifeAuras. | ||||||||
| Attack: | Scutz will use a FireTower like Flameman. Scutzer will use Viney and Plantman's Vine attack. Scuttle will create an IceCube and launch it down the row where it will stop at the edge, a hole, or other cube, or shatter upon hitting MM or an object. Scuttler will summon three consecutive lightning bolts, each aimed for MM's panel. Scuttlest and the Omega version will fire a powerful laser beam piercing down the entire row. | ||||||||
| Bio: | The Life Virus' spawn. They represent the strongest aspects of all viruses. They're also a huge pain to deal with. Getting an S Busting Level against any group of these is going to be nearly impossible since you have to first get rid of the Auras and then still deal with their large HP, all while avoiding their myriad barely avoidable attacks. The good news is that the only chip they drop is LifeAura D, a MegaChip so you don't really need more than one. Equip Collect so the Busting Level isn't a big problem and then just worry about surviving battle after battle against these things while you're wandering Secret3. | ||||||||
| Virus | Name | HP | Atk | Chips/BustingLvl |
Locations | |||
1-7 |
7-10 |
10-S |
Cust S |
|||||
 |
Number(s) | 250 | 1000 | n/a |
Secret1 Numbers | |||
| Number-M (MegaNbrs) |
400 | 1000 | n/a |
Secret2-3 Numbers | ||||
| Number-G (GigaNbrs) |
650 | n/a | n/a |
Secret3 Numbers | ||||
| Moves: | None. | |||||||
| Attack: | Err&Del. If a black one is hit then it responds with a time-stopped lightning bolt that pierces Shielding, Invis, Shadow, and Mole. | |||||||
| Bio: | These things are set up as special puzzles in Secret Area and strategies for each one are described in the walkthrough Chapter 9. | |||||||